![]()
netAccel Wi-Fi Edition User Guide
No software installation or account login required.
Just follow the steps below to complete all setup.
1. Connect Ethernet, Power, and Scan QR Code
1. Unbox – You’ll find 4 items:
- netAccel × 1
- Ethernet cable × 1
- Power cable × 1
- Charger adapter × 1

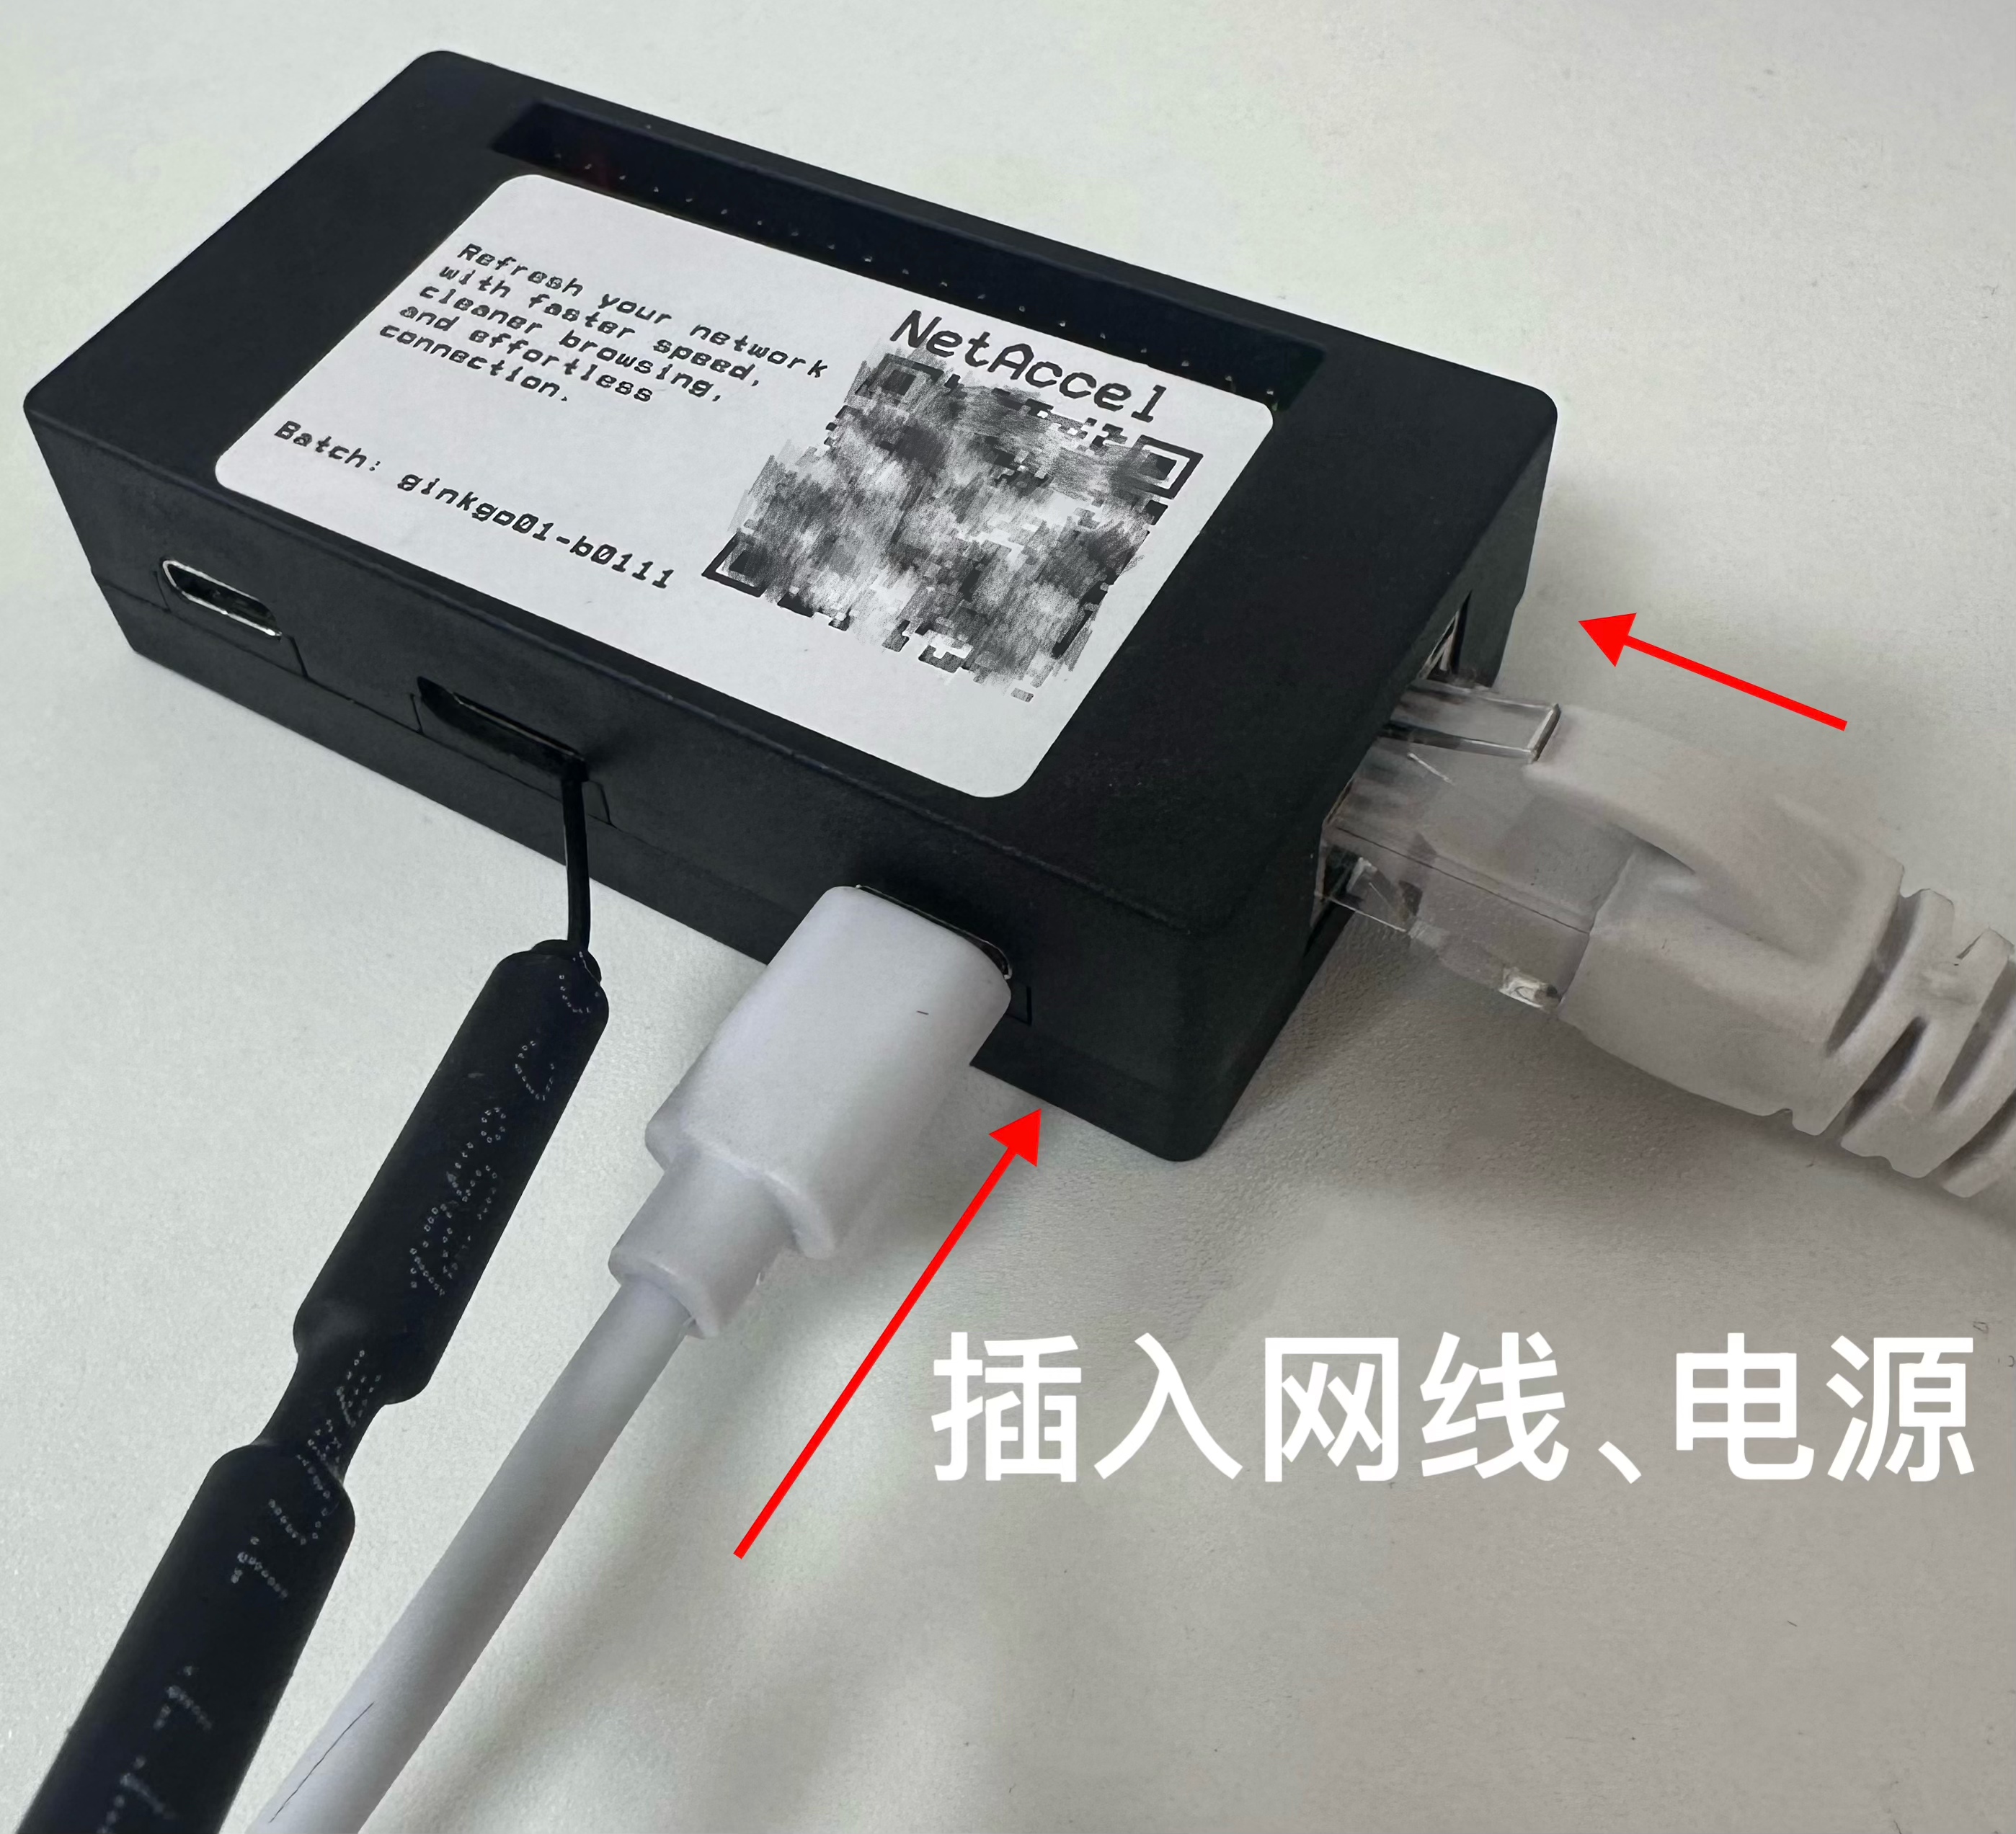
2. Connect Ethernet and power as shown
- Insert one end of the Ethernet cable into the netAccel
- Insert the other end into any LAN port on your home router or switch
- Plug the power cable into the netAccel
- Plug the charger into a wall outlet
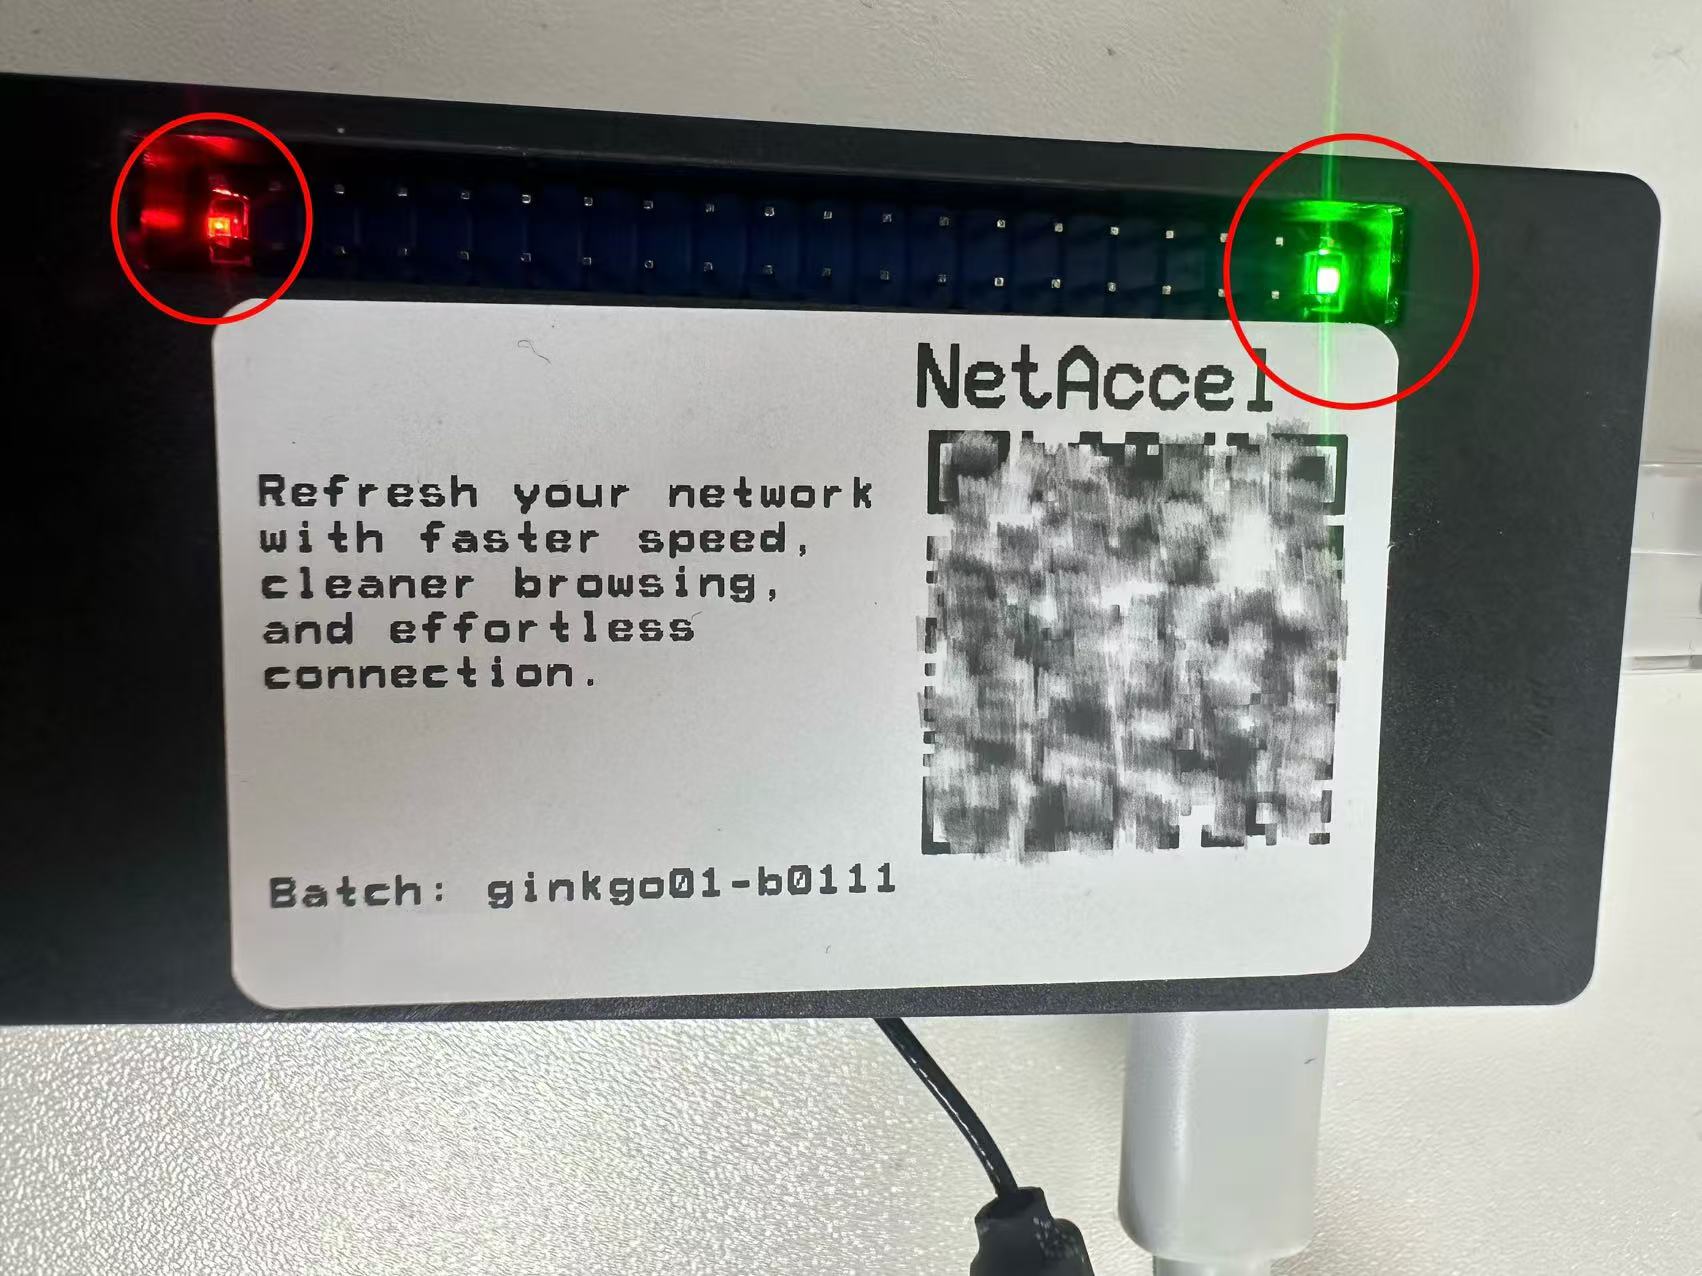
3. Wait 1–2 minutes for lights to stabilize
- During boot, red + green lights will blink
- A steady light indicates successful startup
- If unsure, wait 2–3 extra minutes after the green light appears
4. Scan the QR code on the netAccel
- Use WeChat or your phone’s camera to scan the QR code
- You’ll be redirected to a status page with key device info

From this page, note these two critical pieces of information:
- Device MAC: bead9d2a8a77
- Local IP Address: 192.168.0.32
You’ll need these for device configuration.
We recommend taking a screenshot and photographing the QR code for future use.
2. Mobile Device (Android / iOS) Connection to netAccel Wi-Fi
Prerequisites
- netAccel is powered and connected via Ethernet
- You’ve scanned the QR code and obtained the local IP and MAC
- The netAccel broadcasts a Wi-Fi network named: netAccel-XXXX
where XXXX = last 4 characters of the device MAC (uppercase if letters) - Wi-Fi password: DBP181-XX
where XX = 7th and 8th characters of the MAC (uppercase if letters)
1. Connect to Wi-Fi Network: netAccel-XXXX
Android
- Go to Settings → Wi-Fi
- Select netAccel-XXXX from the list
- Enter the password as described above
- Wait for “Connected” status
iOS
- Go to Settings → Wi-Fi
- Select netAccel-XXXX
- Enter the password
- A checkmark will appear when connected

3. netAccel Network Environment Learning (Recommended for First Use)
Brief Explanation:
- How Pi-hole and Unbound eliminate network noise
- The 13 DNS root servers identities
- Why netAccel needs to “learn” in a new location
Read “Clean Web · Technical Principles” →
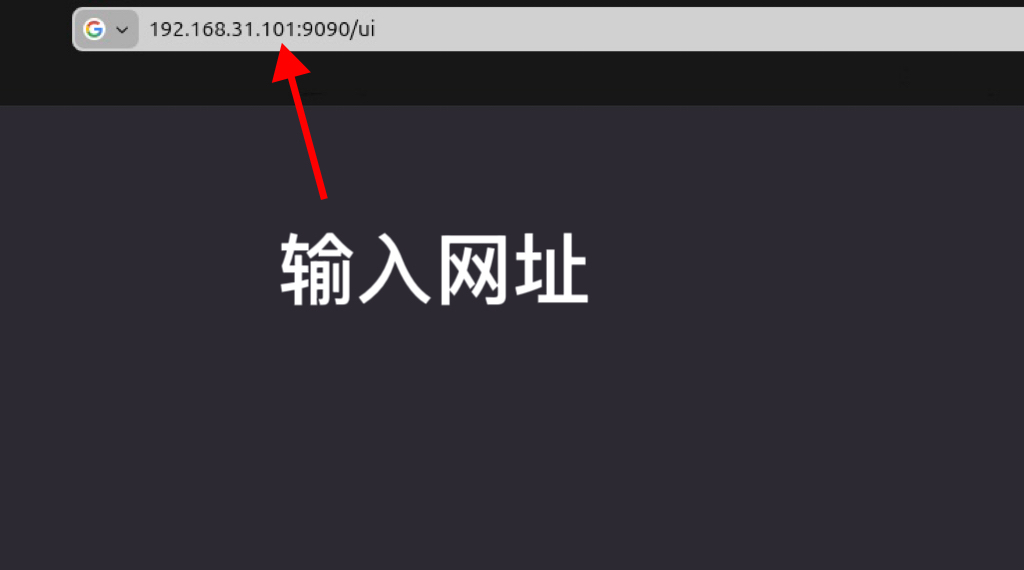
Assuming your netAccel is online with local IP (e.g., 192.168.31.101):
On any device connected to the same network, open a browser and go to:
http://192.168.31.101:9090/ui/ (use http, not https)
Enter URL http://192.168.31.101:9090 and password: DBP181000, then click “Add”:

Click the small globe icon:
Then click “netAccel”:
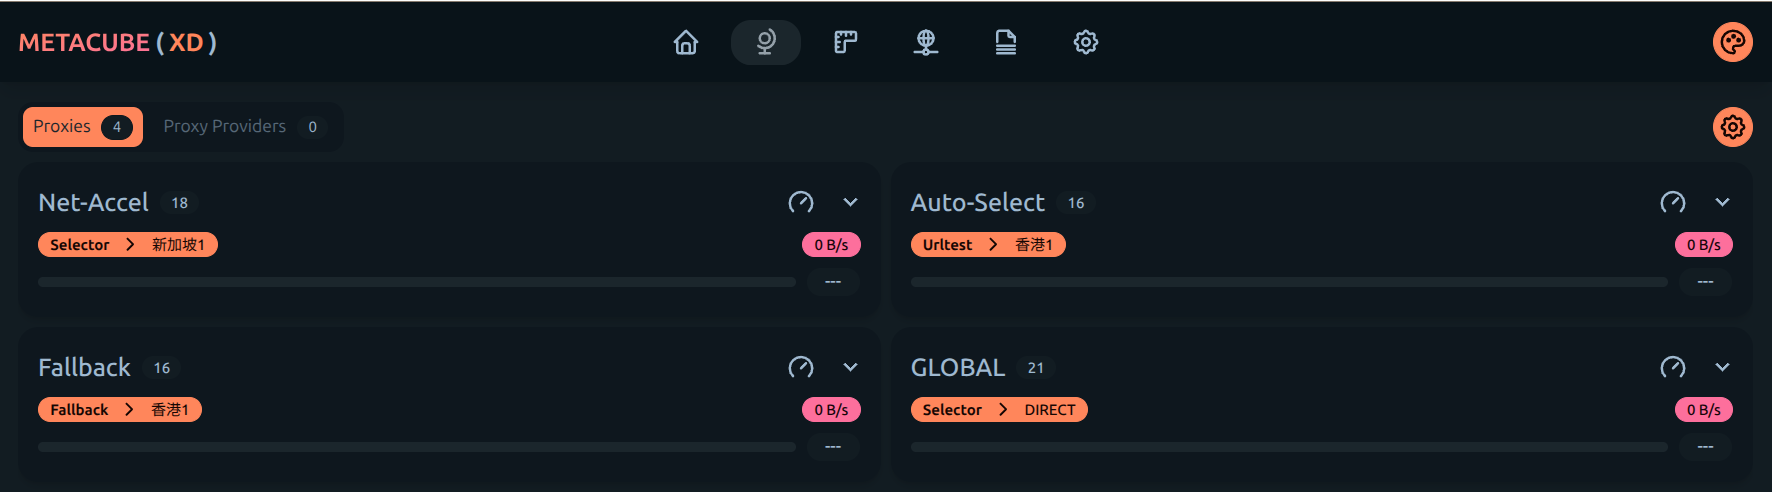
Click (---) on each tile to view latency. Click a tile to select that node.
This manually triggers Pi-hole and Unbound to find a clean path to root DNS servers.
When complete, the status turns green:
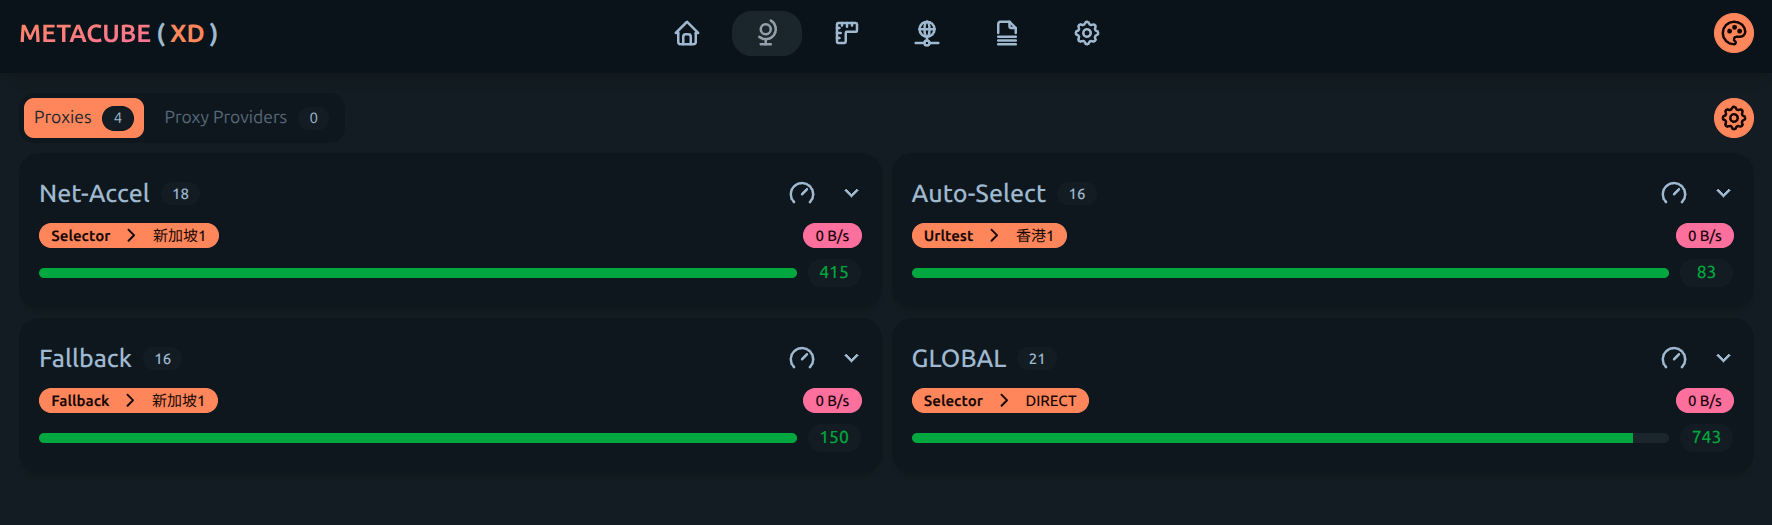
Your netAccel has now adapted to the new network environment.
4. Configure Proxy Settings on Mobile Devices
Now configure the proxy to route traffic through the netAccel.
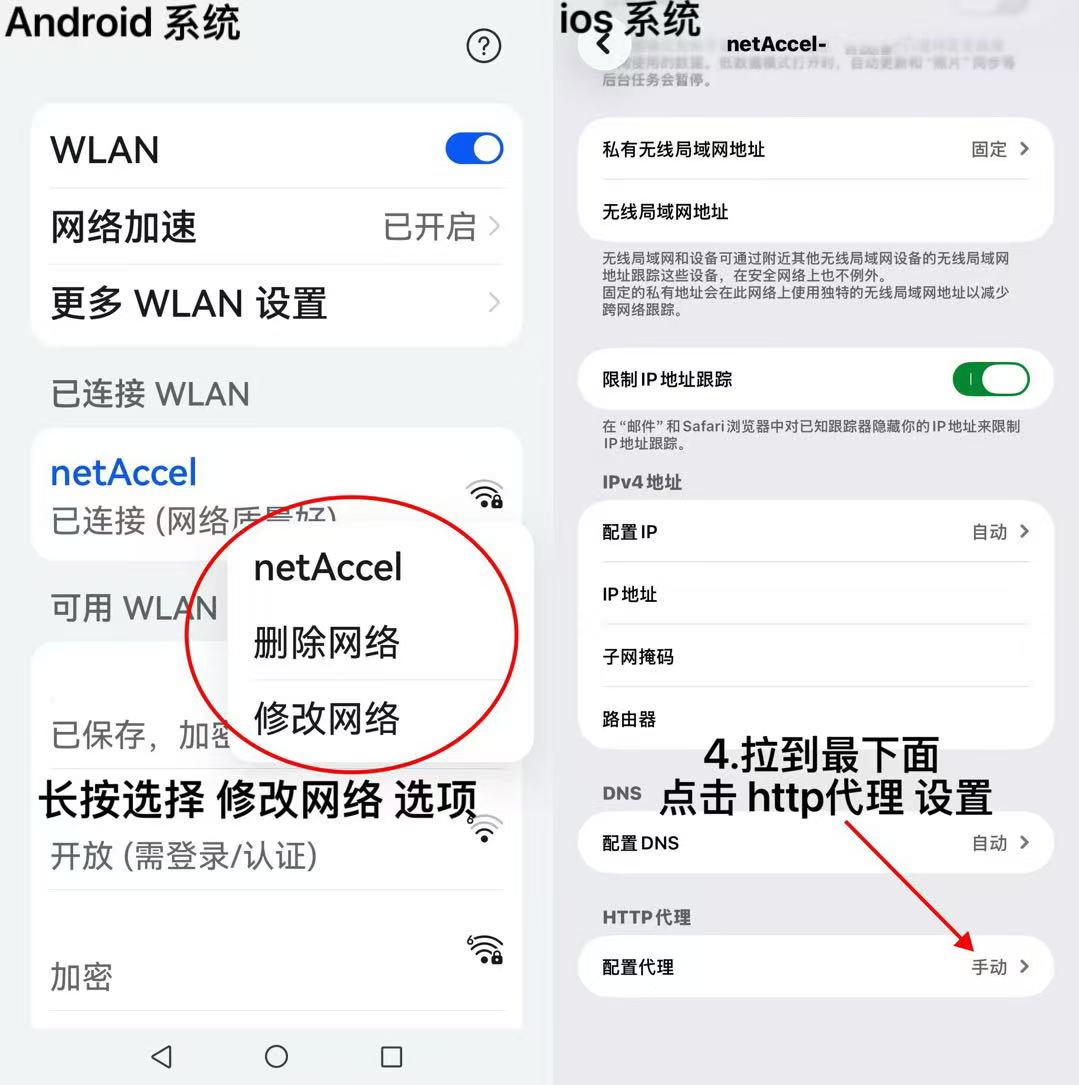
Android
- In Settings → Wi-Fi, long-press netAccel-XXXX
- Select Modify network
- Enable Advanced options
- Set Proxy → Manual
iOS
- Go to Settings → Wi-Fi
- Tap the ⓘ next to netAccel-XXXX
- Scroll to HTTP Proxy → Configure Proxy → Manual
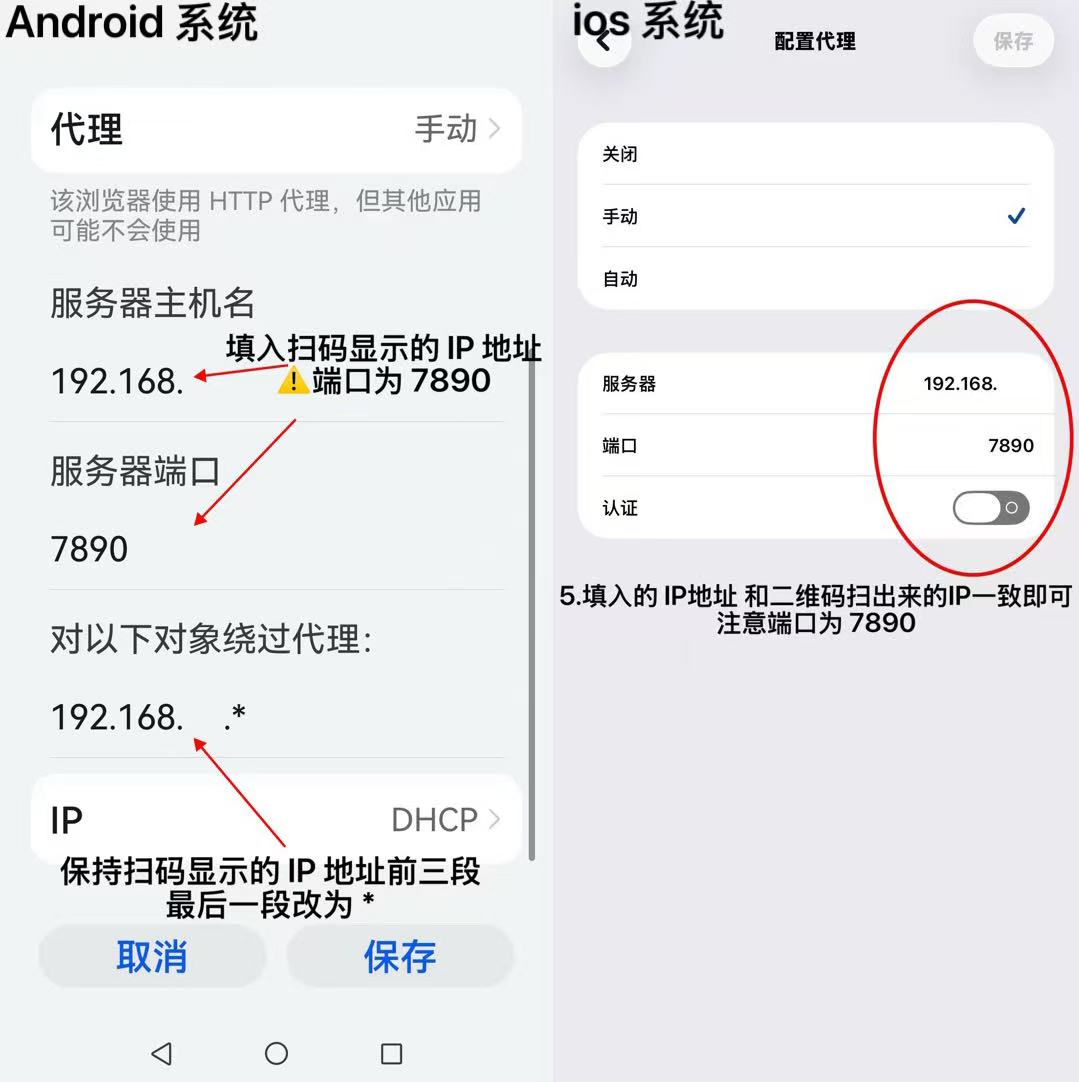
3. Enter Proxy Details
Android
- Proxy hostname: enter the scanned local IP (e.g.,
192.168.10.101) - Bypass proxy for: enter first three octets +
*(e.g.,192.168.10.*) - Proxy port: 7890
- Tap Save—device will reconnect
⚠️ Do not add spaces, any other characters, or prefixes like http://.
iOS
- Server: enter the scanned local IP
- Port: 7890
- Tap Store to save
5. Windows 10/11 Manual Configuration Guide
Prerequisites
- netAccel is powered and online
- You have the local IP from scanning
- Your PC is connected to the netAccel-XXXX Wi-Fi network
1. Windows 10
- Click network icon → connect to netAccel-XXXX
- Or go to Settings → Network & Internet → Wi-Fi to connect
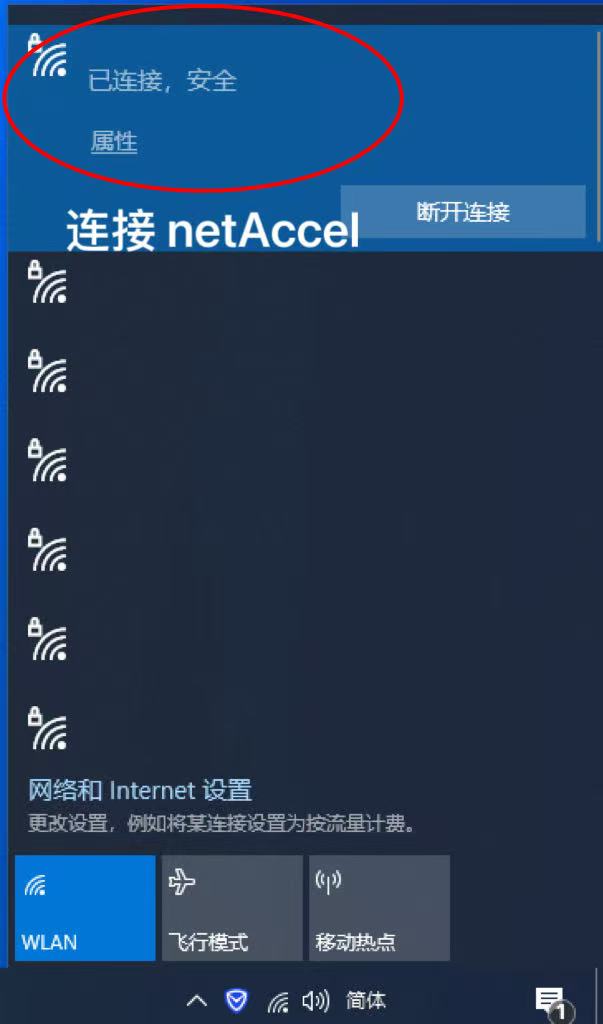
- Open Settings → Network & Internet
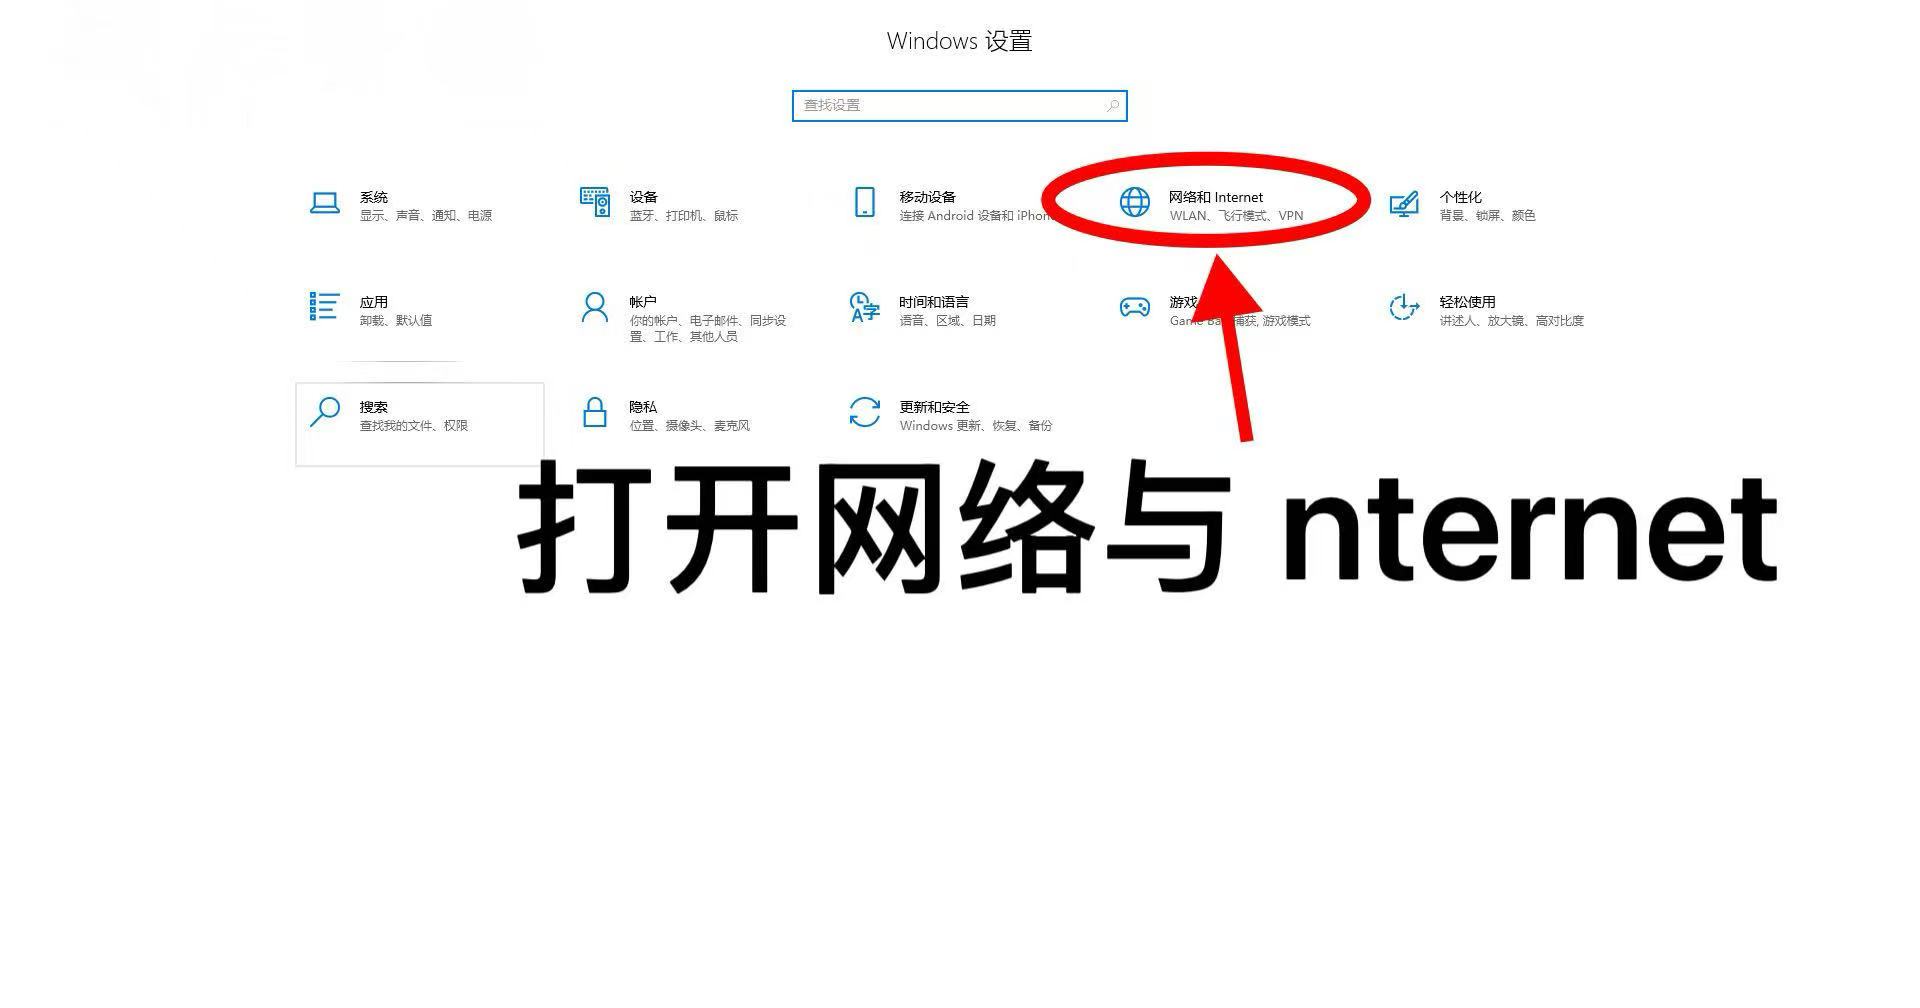
- Click Proxy on the left
- Proceed to manual setup (see Windows 11 instructions below for full details)
2. Windows 11
- Ensure you’re connected to netAccel-XXXX
- Open Settings → Network & Internet
- Click Proxy
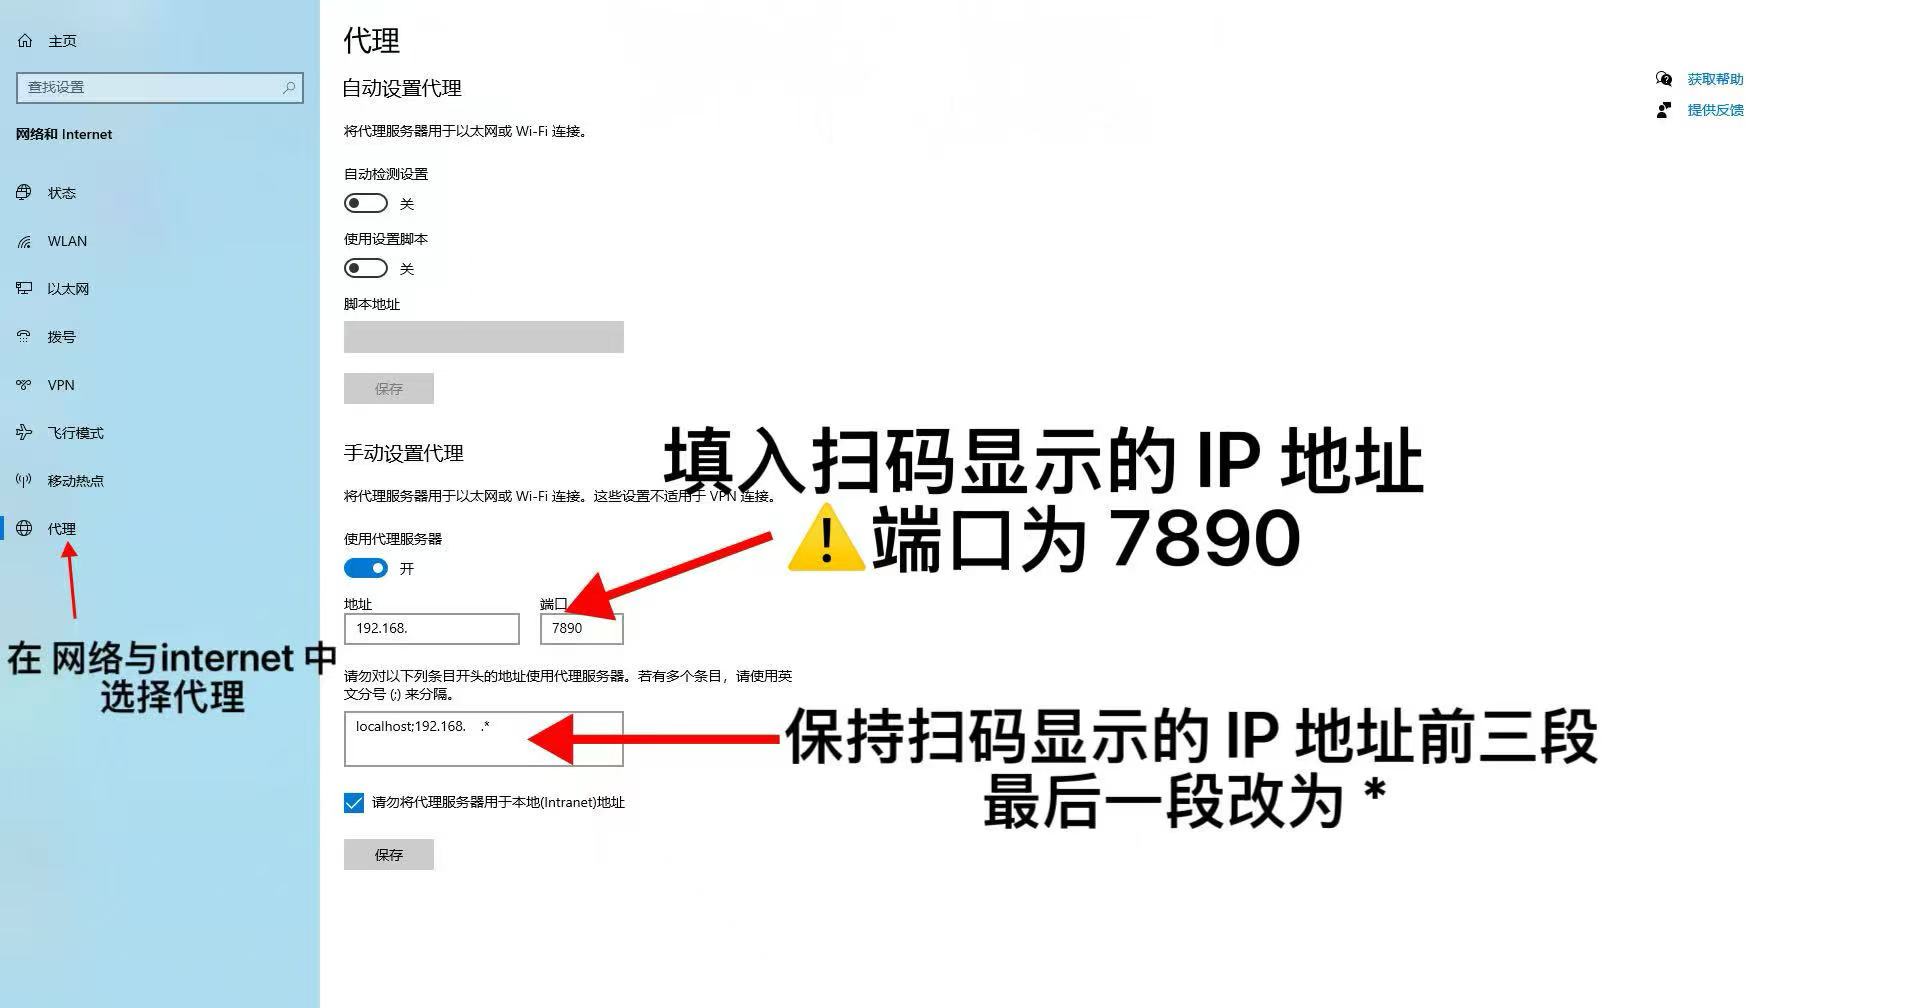
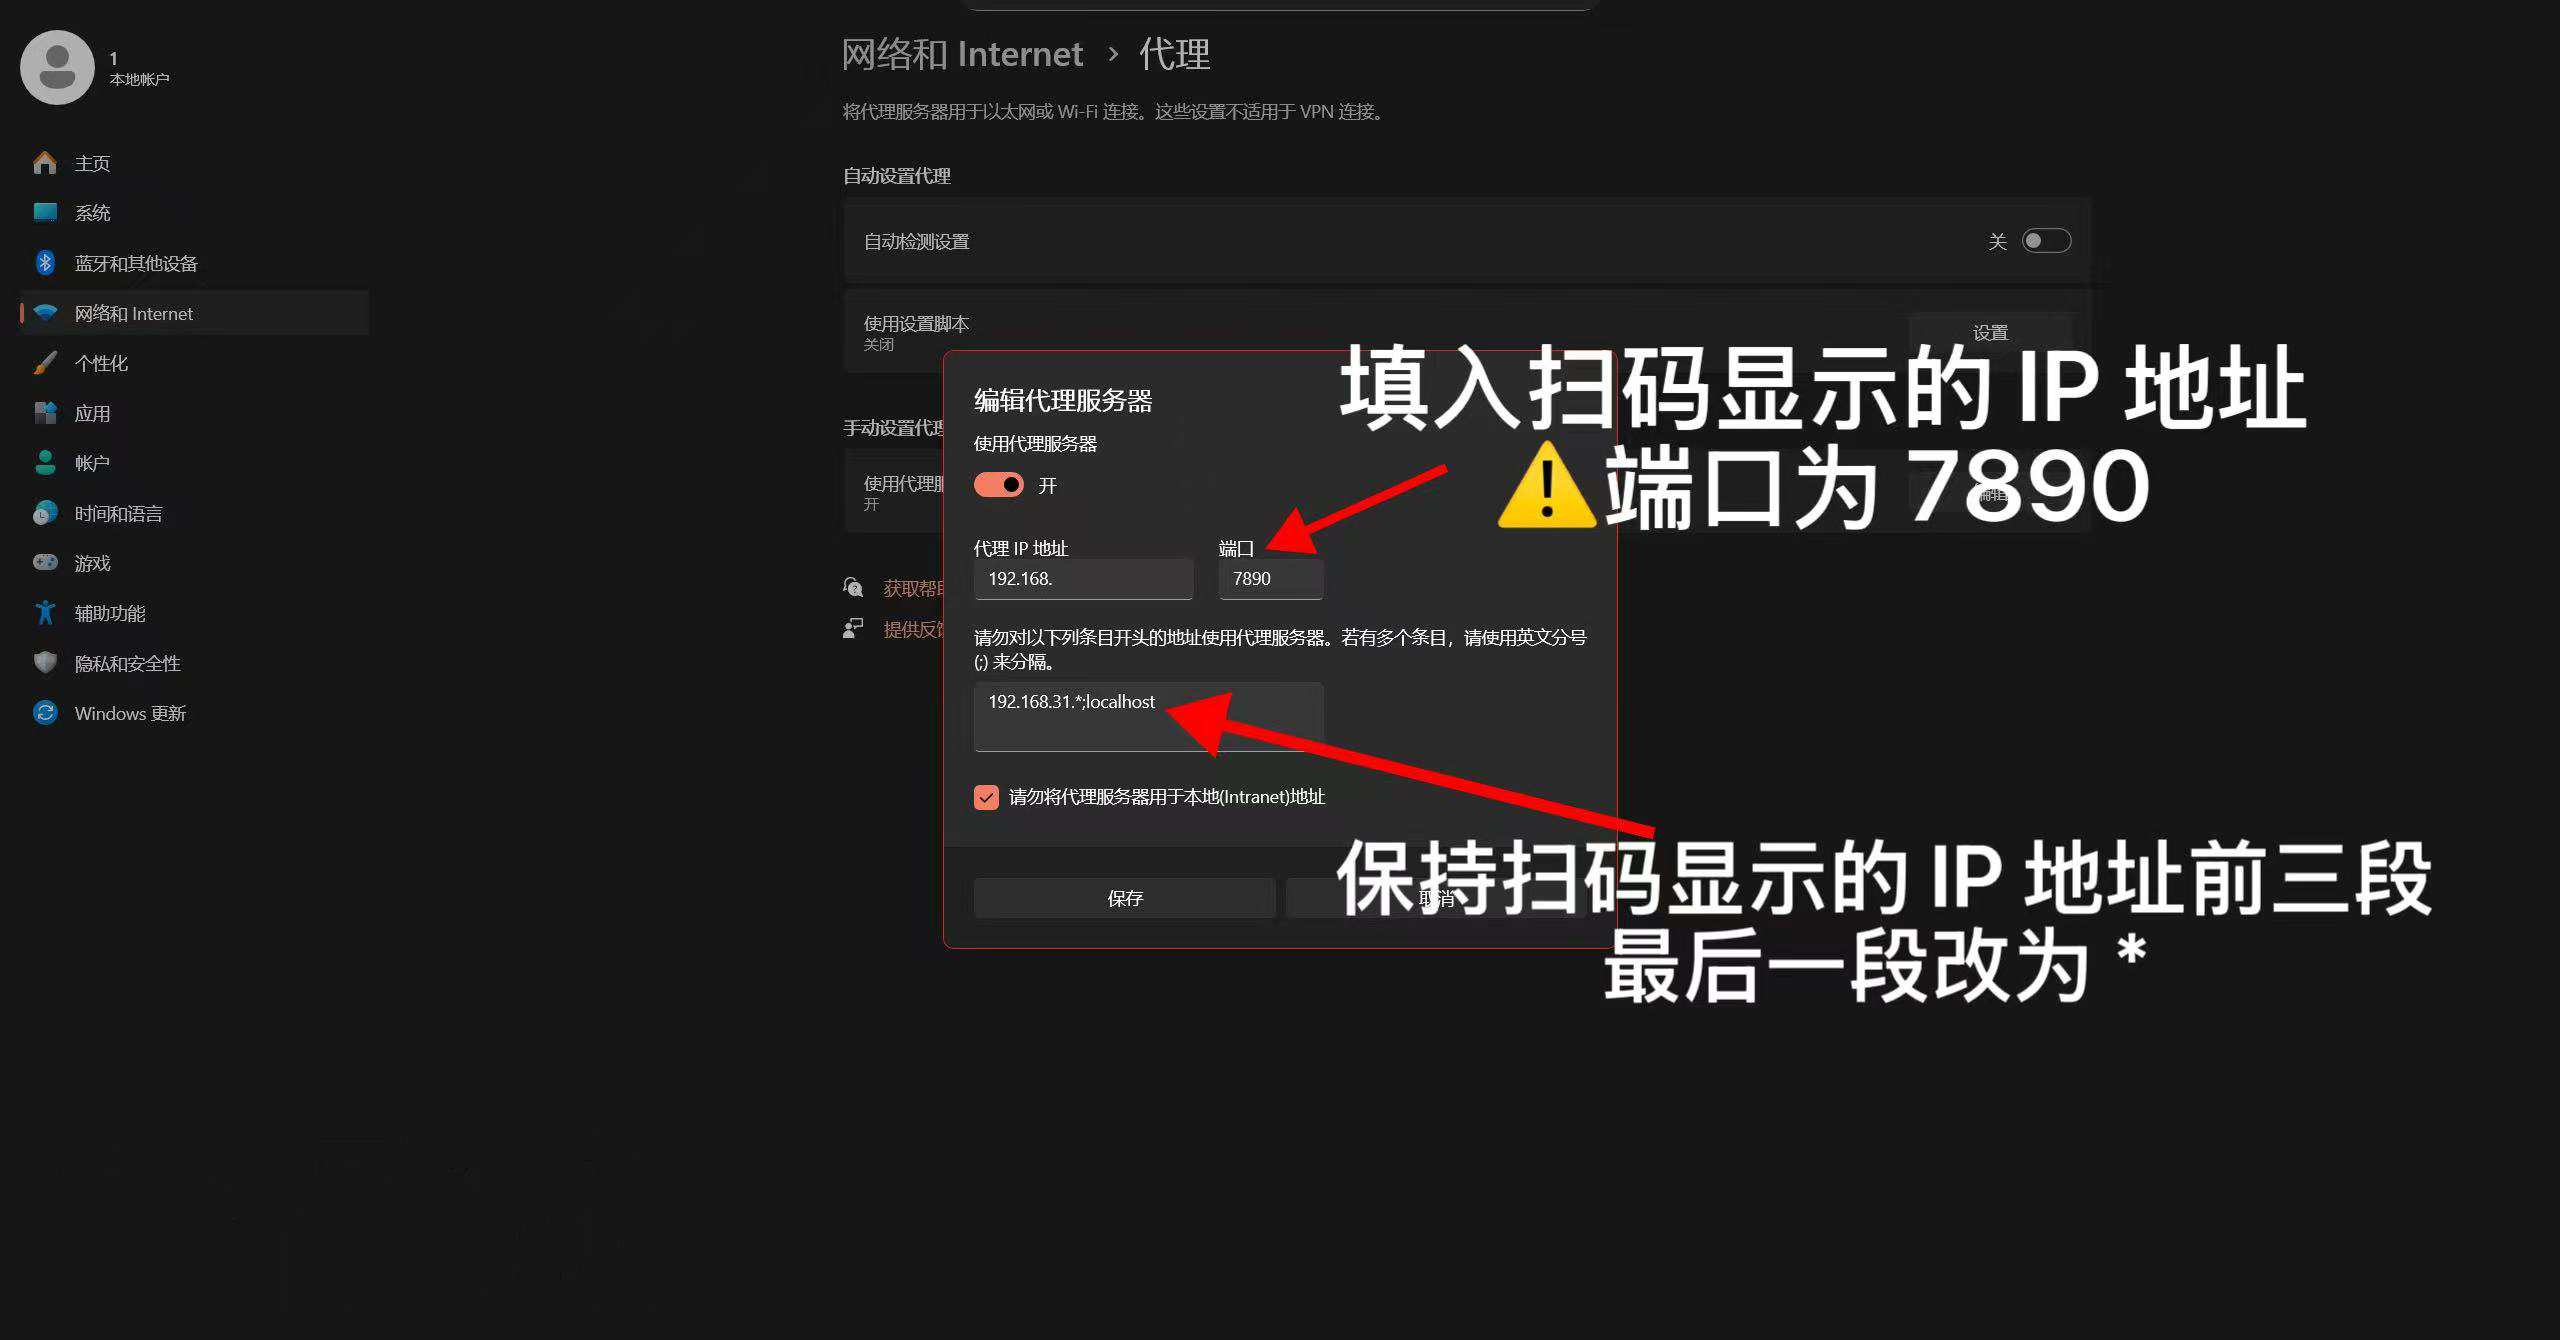
- Under “Manual proxy setup,” click Edit
- Toggle Use a proxy server to On
- Enter the scanned local IP as the address
- In “Don’t use the proxy for,” enter: e.g.,
192.168.10.* - Set Port to: 7890
- Click Save
After saving, your PC will route traffic through the netAccel.
🎉 Congratulations!
You’ve successfully set up your netAccel Wi-Fi Edition.
For daily use, simply connect to the netAccel-XXXX Wi-Fi network.
Notes:
- 1. To disable netAccel features, remove proxy/DNS settings from your device. The netAccel only affects devices you’ve configured—it won’t impact others.
- 2. During network learning (Step 3), choose nodes with lower latency values.
- 3. Please photograph the QR code on your netAccel for future reference.
- 4. Known limitation: If your upstream router requires individual device authentication (e.g., captive portal), using the netAccel Wi-Fi with proxy enabled may cause disconnections. In such cases, use the netAccel in bridge mode only. This limitation will be addressed in a future revision.