![]()
netAccel Standard Edition User Guide
No software installation or account login required.
Just follow the steps below to complete all setup.
1. Connect Ethernet Cable, Power, and Scan QR Code
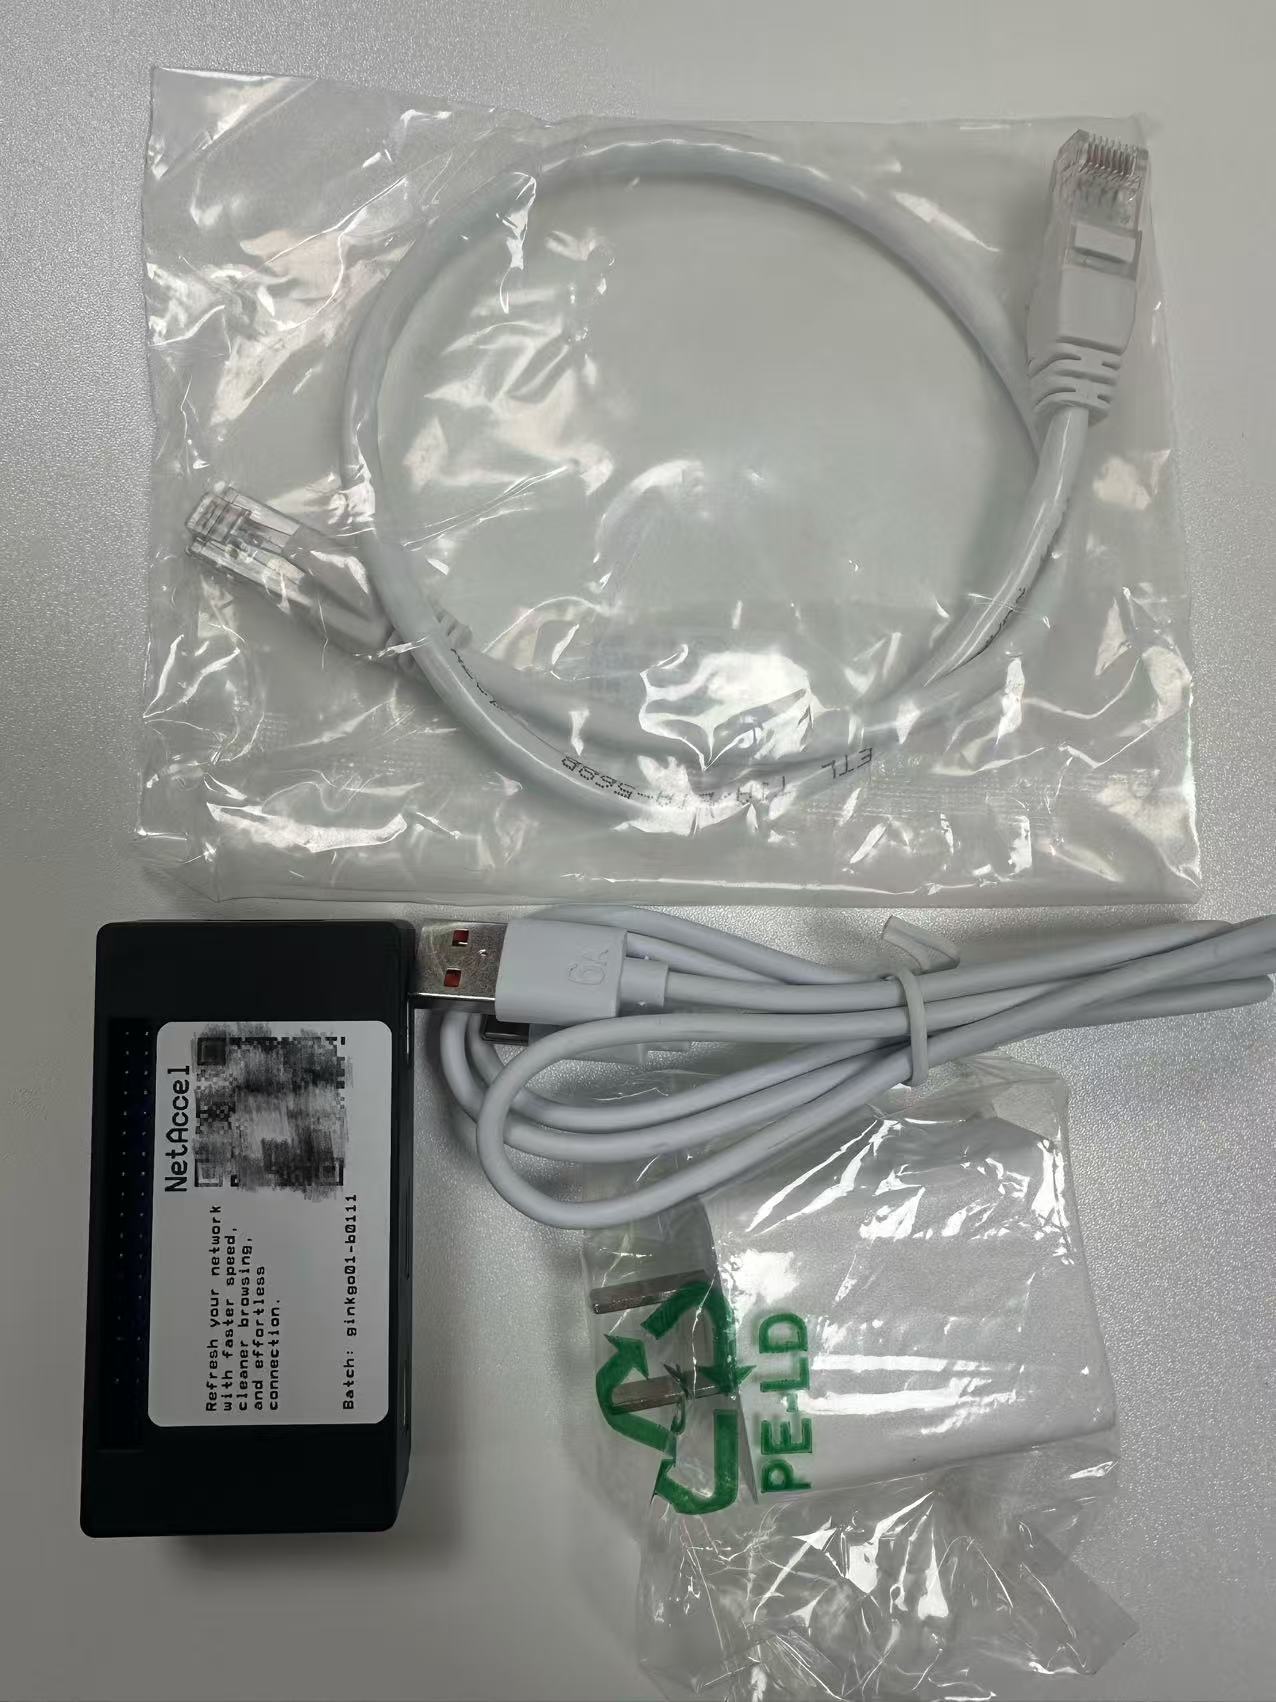
1. Unbox – You’ll find 4 items:
- netAccel × 1
- Ethernet cable × 1
- Power cable × 1
- Charger adapter × 1
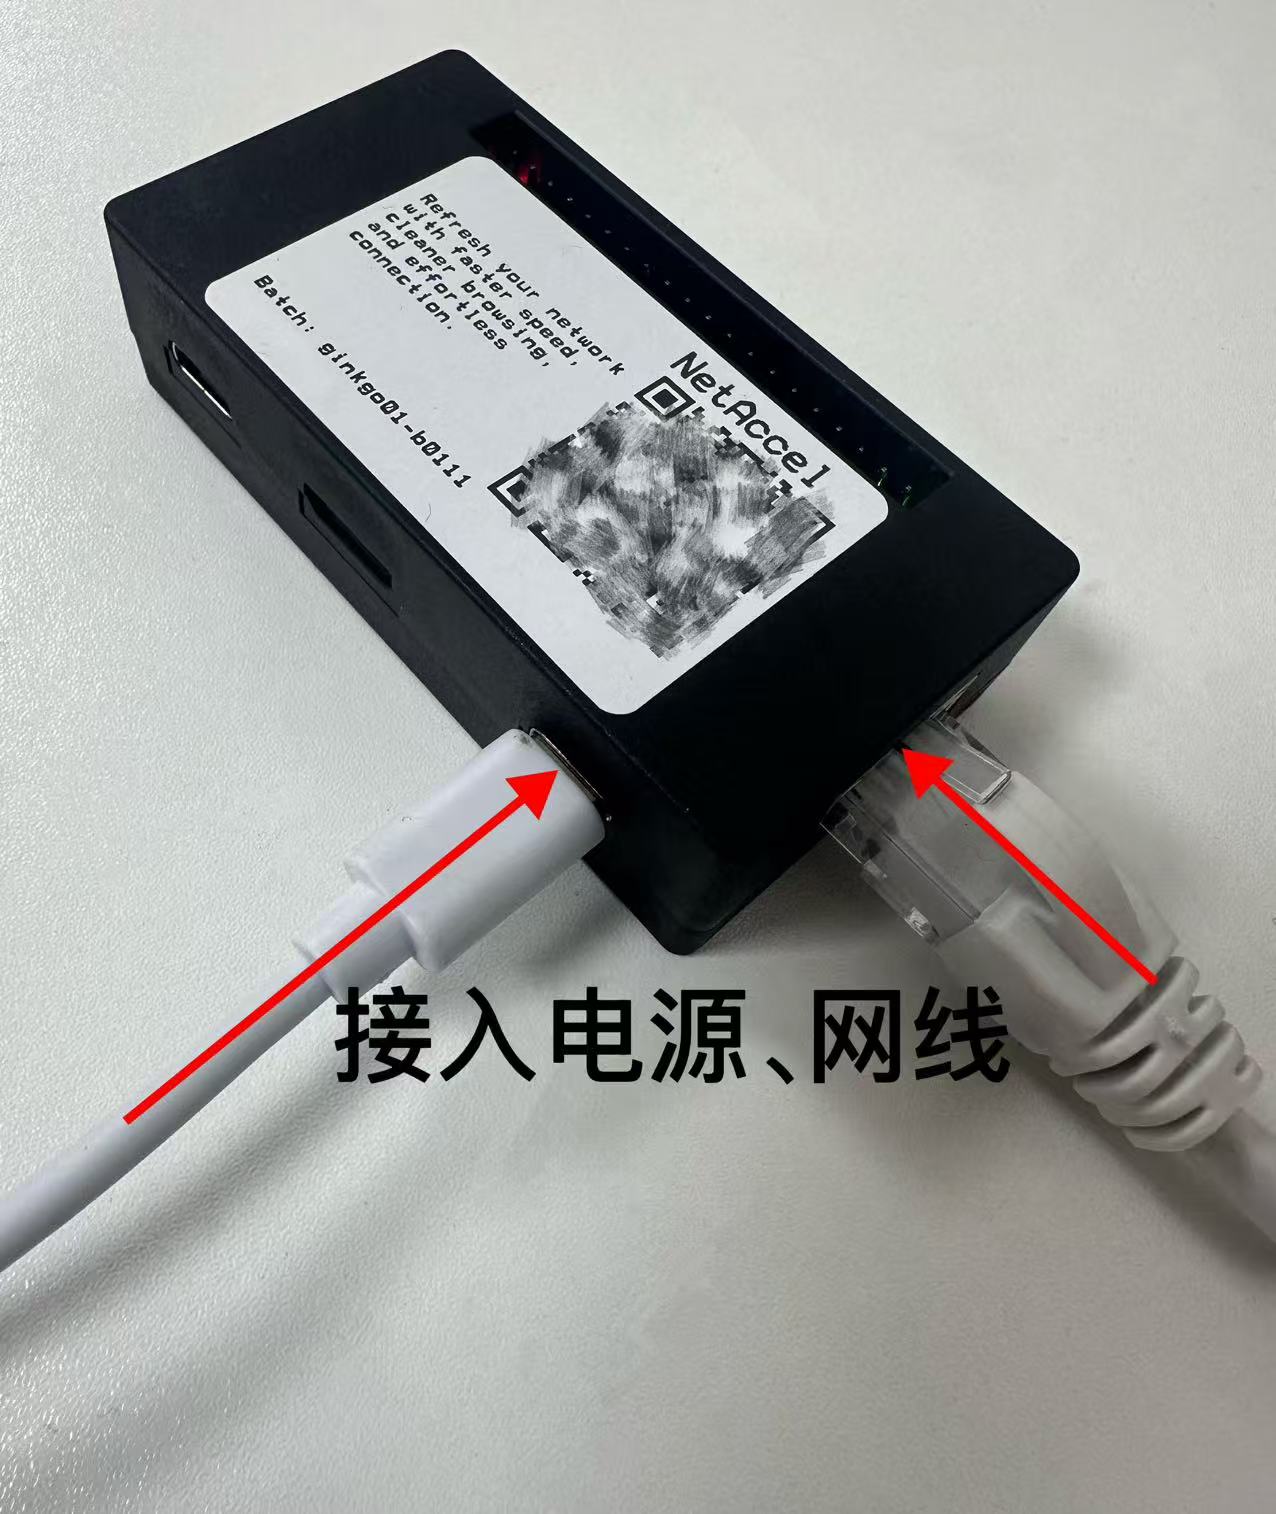
2. Connect Ethernet and power as shown
- Insert one end of the Ethernet cable into the netAccel port
- Insert the other end into any LAN port on your home router or switch
- Plug the power cable into the netAccel
- Plug the charger into a wall outlet to power the device
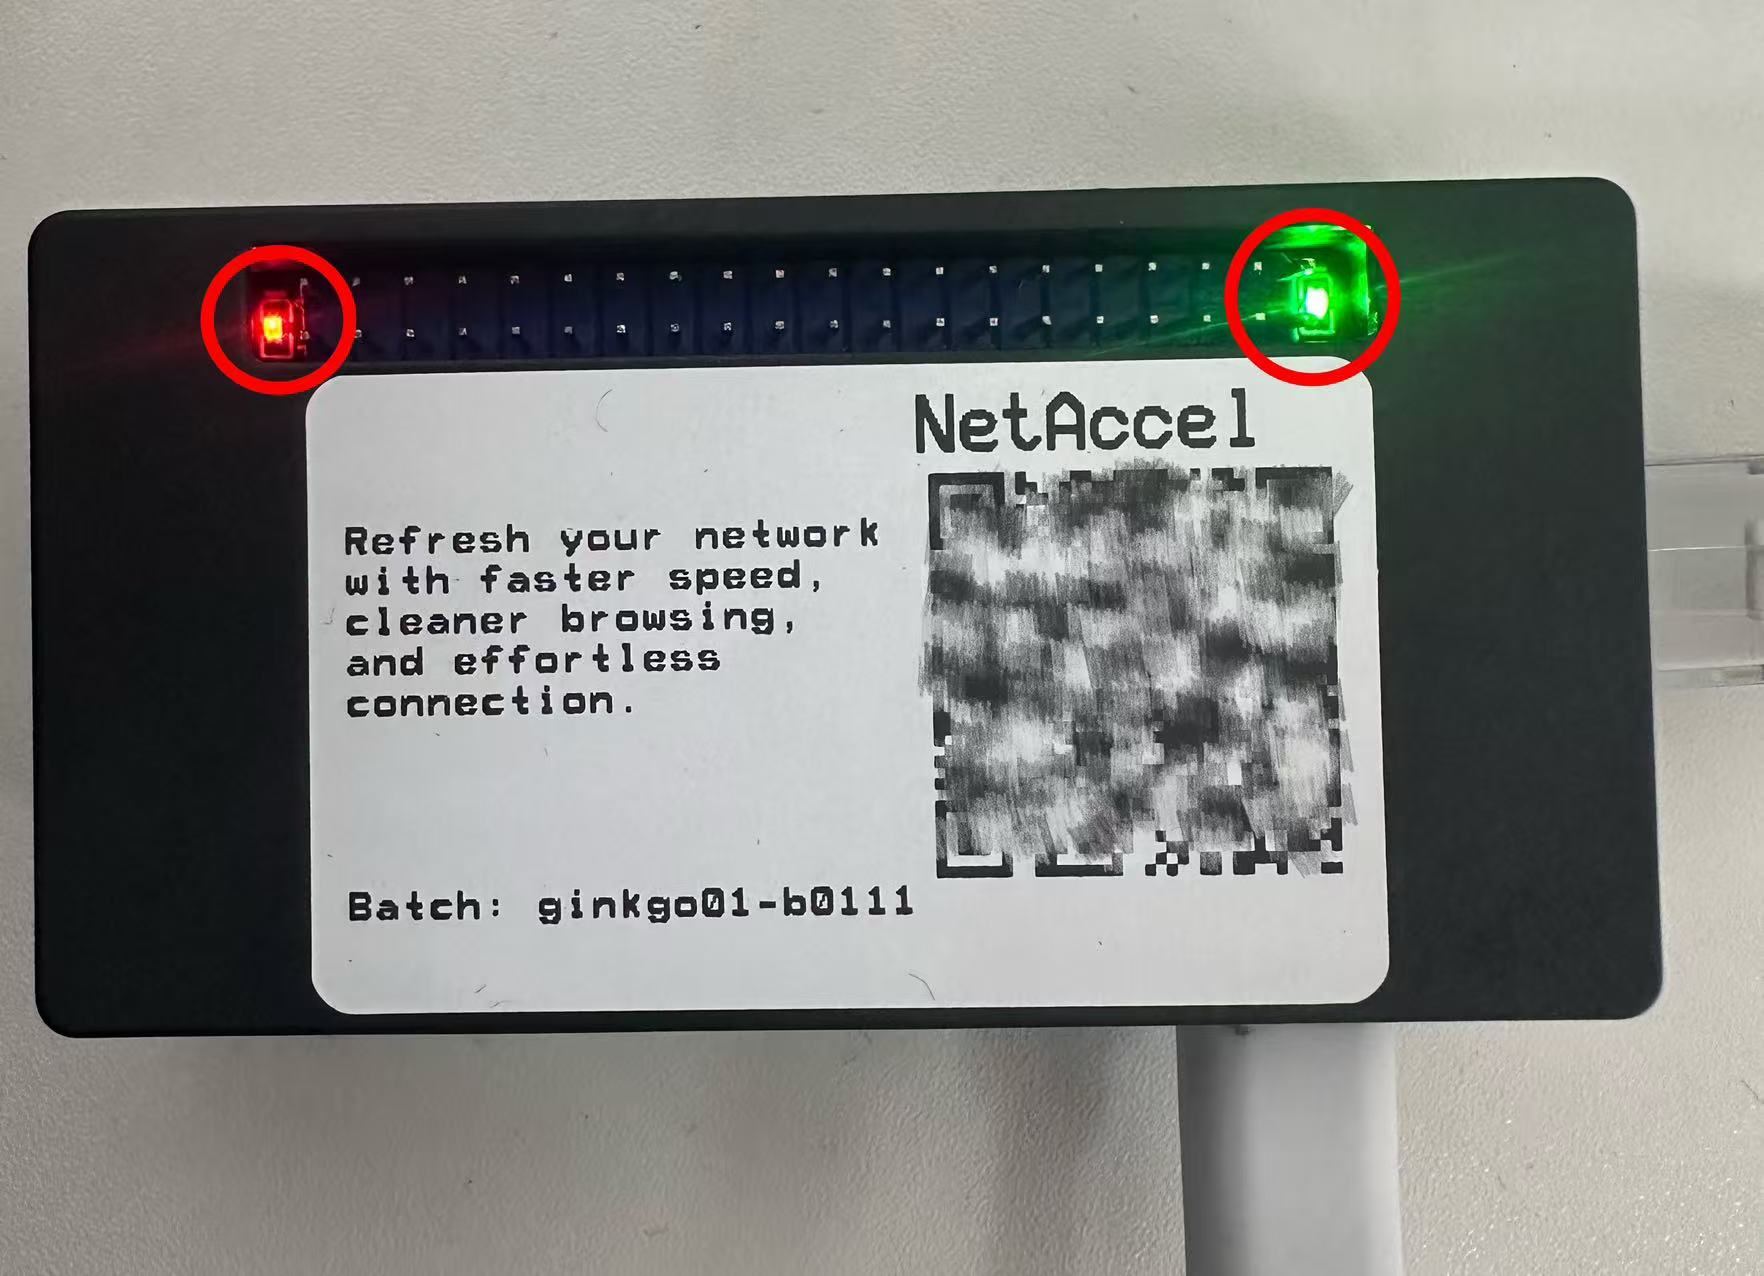
3. Wait 1–2 minutes until the lights stabilize
- During startup, you’ll see red + green lights blinking
- When the green light stays solid, the device has booted successfully
- If unsure, wait an additional 2–3 minutes after the green light appears before scanning
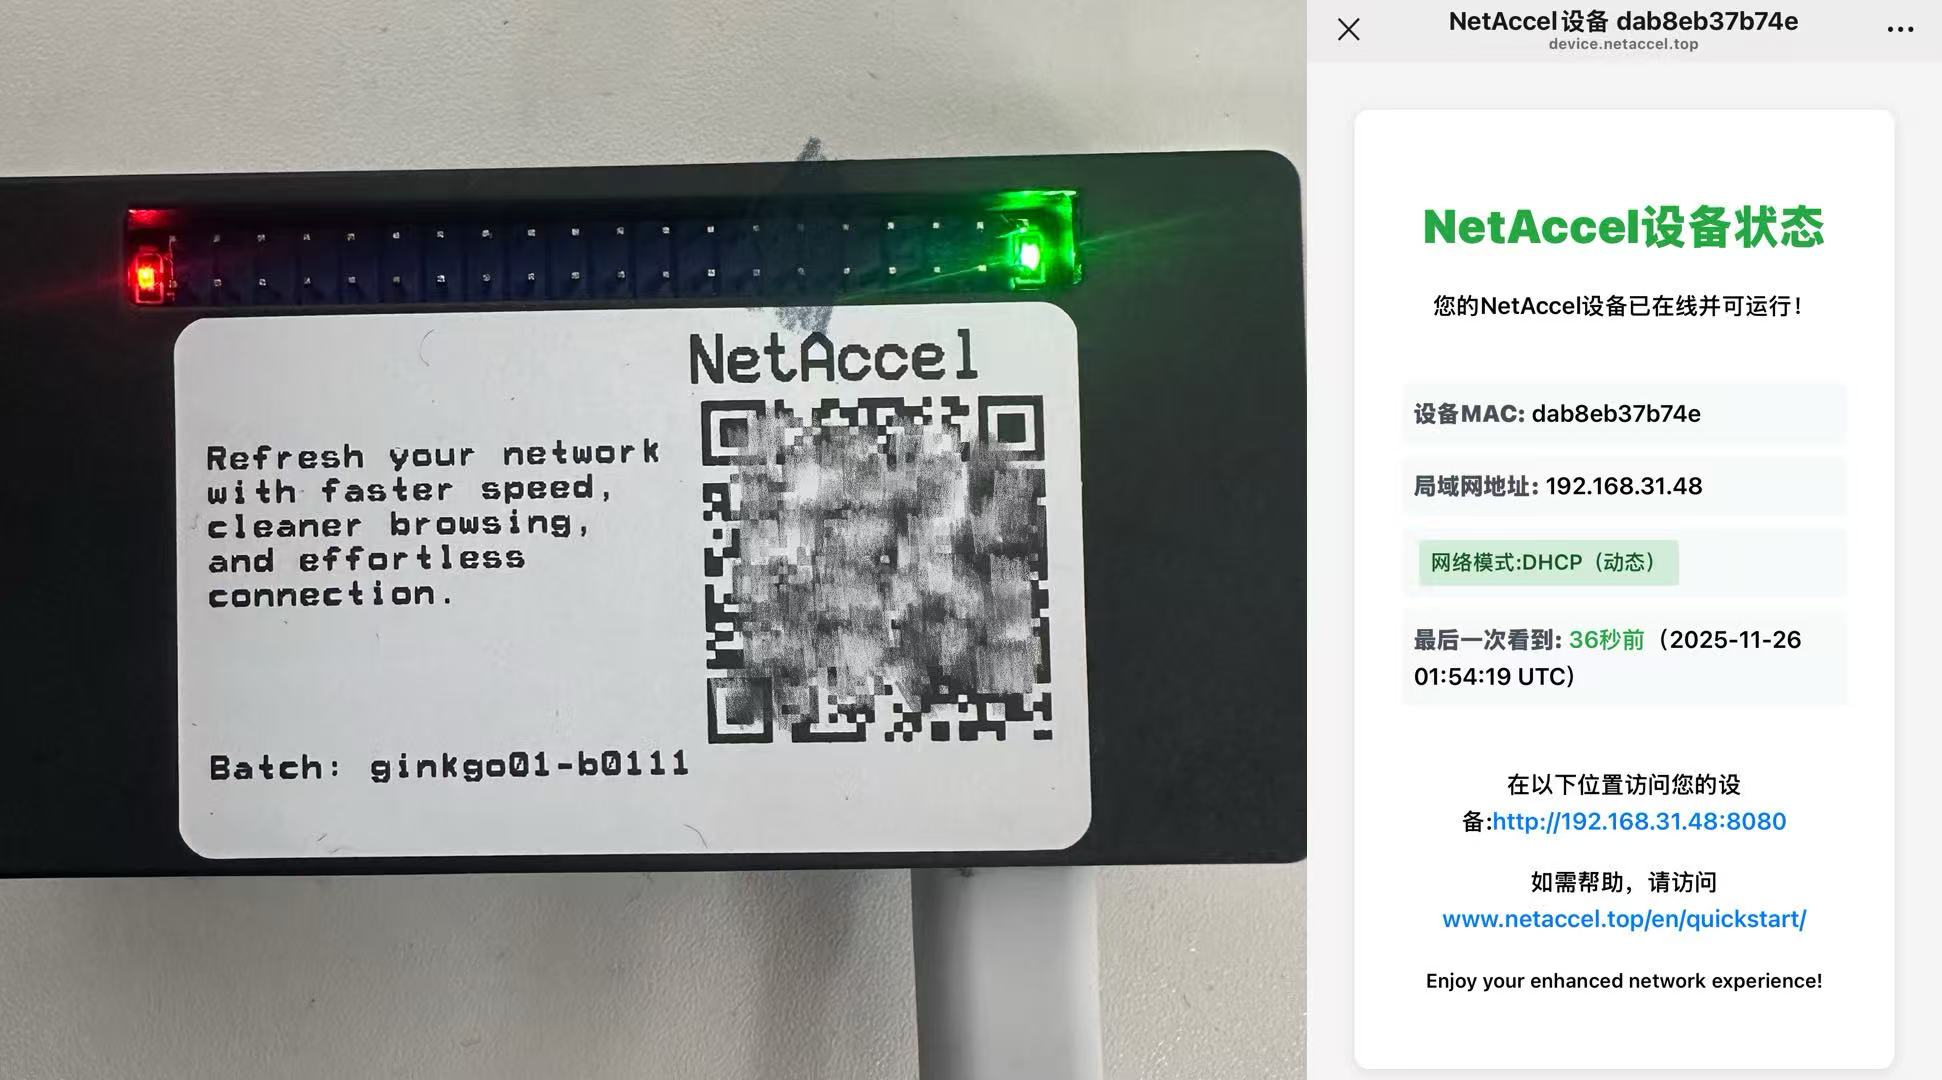
4. Scan the QR code on the netAccel with your phone
- Open WeChat or your phone’s built-in scanner and scan the QR code on the device
- You’ll be redirected to a status page showing key device information
Please record the following details from this page:
- Device MAC: dab8eb37b74e
- Local IP Address:
192.168.10.101 - This IP is used for manual proxy configuration on your phone/computer
- We recommend taking a screenshot of this info
- Also photograph the QR code on the netAccel for future reference
1.1 Recommended: Set a Static Local IP Address
- Static IP assignment means reserving a fixed local address (e.g.,
192.168.31.48) for the netAccel in your router’s subnet.
(In this example, the router manages the192.168.31.xsubnet.
The last number—here, “48”—can generally be any value from 0 to 255, though routers often use .0 or .1.
Check your router’s DHCP range to confirm allowable values. It’s safest to use the IP shown after scanning.) - This ensures that even if you take the netAccel on a trip and later reconnect it at home,
it will always receive the same local IP (e.g.,192.168.31.48). - You can still use the netAccel without this setting:
If the local IP changes, simply re-scan the QR code to get the new address. - The router’s default IP, username, and password are usually printed on a label on its back or side.
(Note: Some ISP-provided routers may not support static IP assignment.)
1.2 netAccel Network Environment Learning (Recommended for First Use in a New Location)
Brief Explanation:
- How Pi-hole and Unbound in netAccel eliminate network noise
- The role of the 13 DNS root server identities
- Why netAccel needs time to “learn” a new network environment
Read “Clean Web · Technical Principles” →
Assuming your netAccel is powered and connected via Ethernet, and you’ve obtained its local IP (e.g., 192.168.31.101):
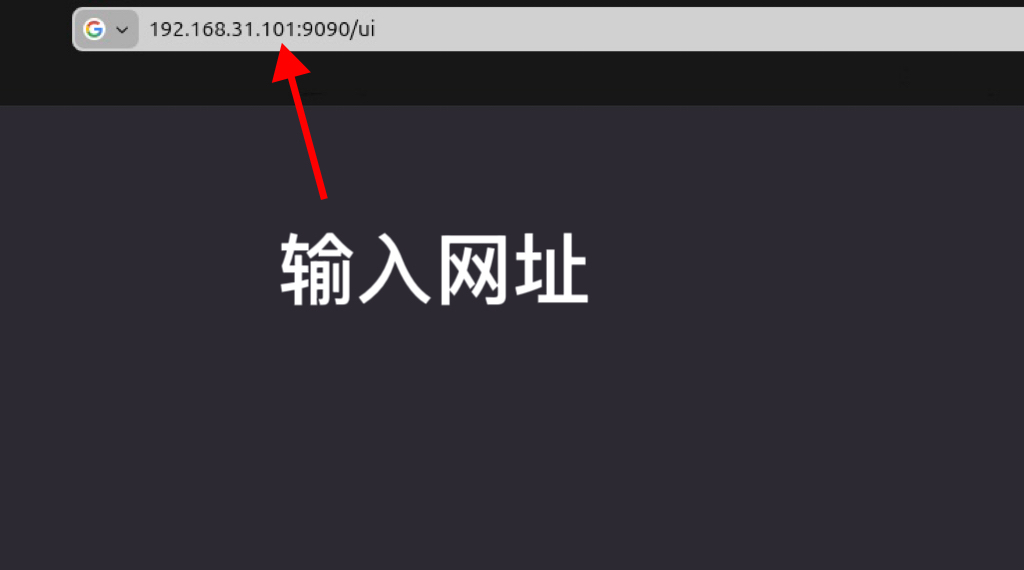
On any device (phone/tablet/computer) in the same subnet, open a browser and enter:
http://192.168.31.101:9090/ui/ (note: http, not https)
Enter the backend URL http://192.168.31.101:9090 and password: DBP181000, then click “Add”:

After logging in, click the small globe icon:
Then click “netAccel”:
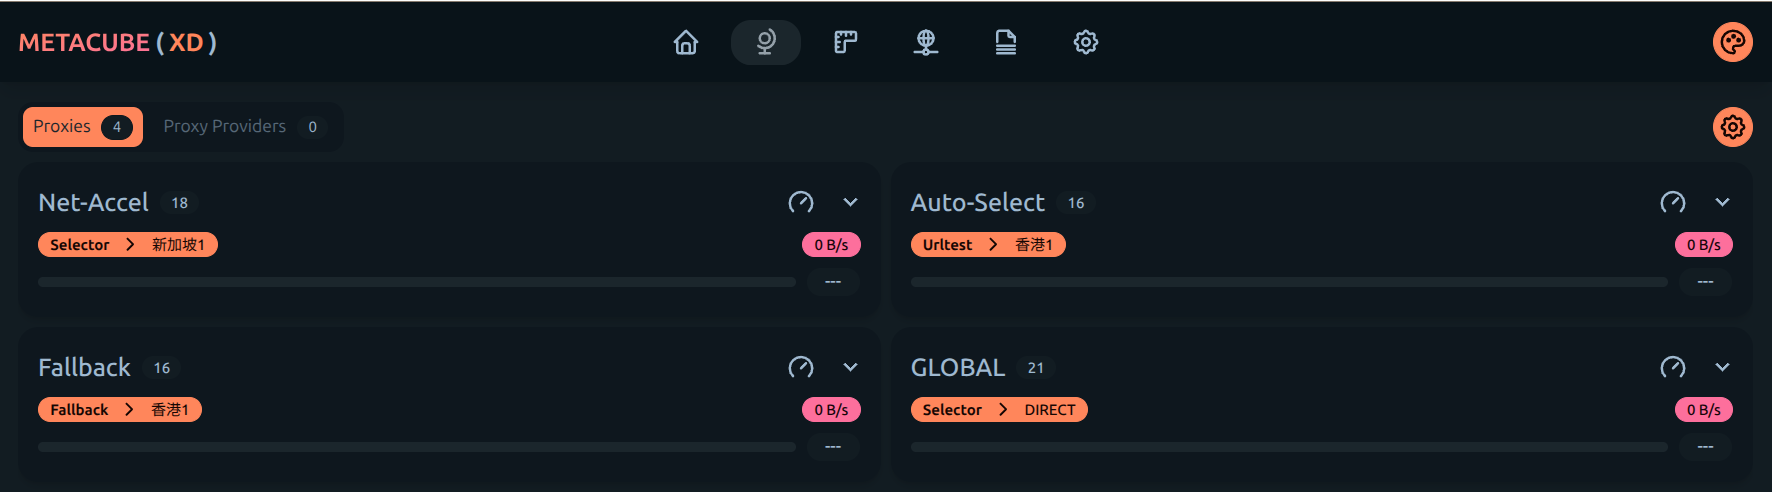
Click the (---) icon in the bottom-right corner of each tile to view latency to that node.
To select a node, simply click its tile.
Each click manually triggers Pi-hole and Unbound to discover a clean path to the root DNS servers.
Once stable, the status turns green—indicating success:
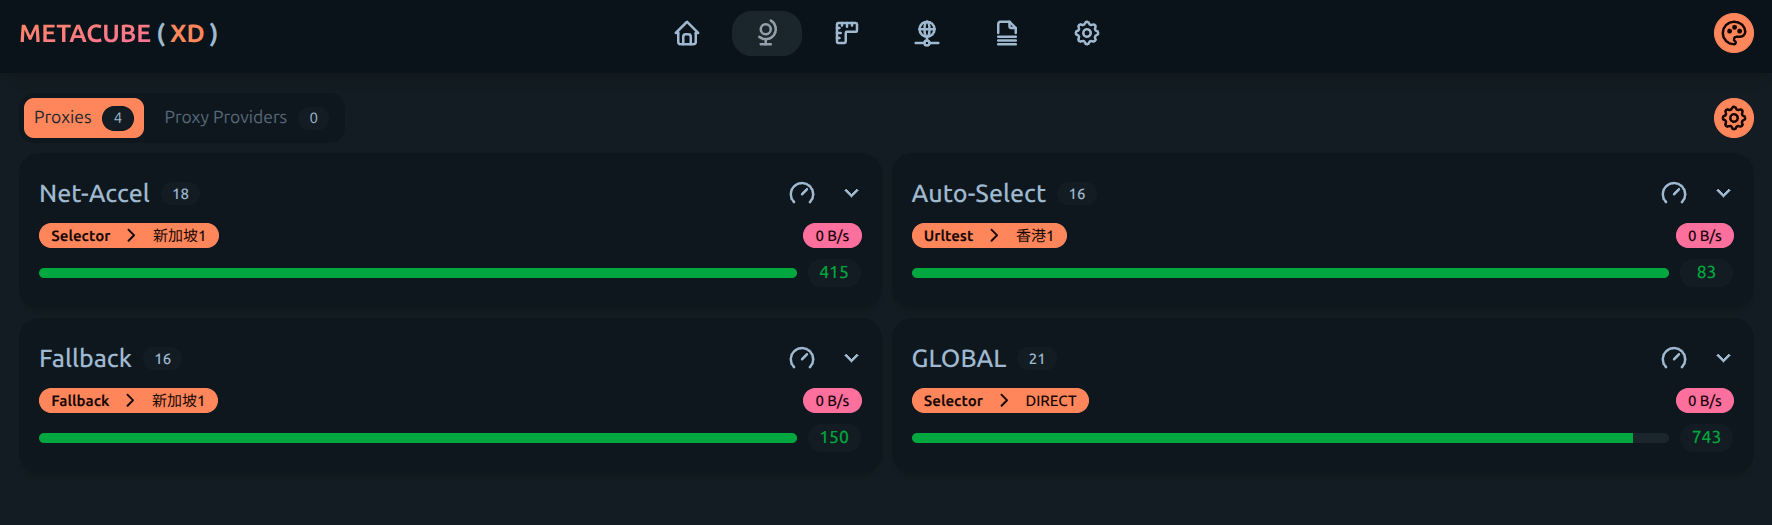
Congratulations! Your netAccel has now learned the new network environment and established a clean path to the root servers.
2. Mobile Device (Android / iOS) Manual Configuration Guide
Prerequisites
- netAccel is connected and powered on
- You’ve scanned the QR code and obtained its local IP
- Your phone is on the same local network as the netAccel
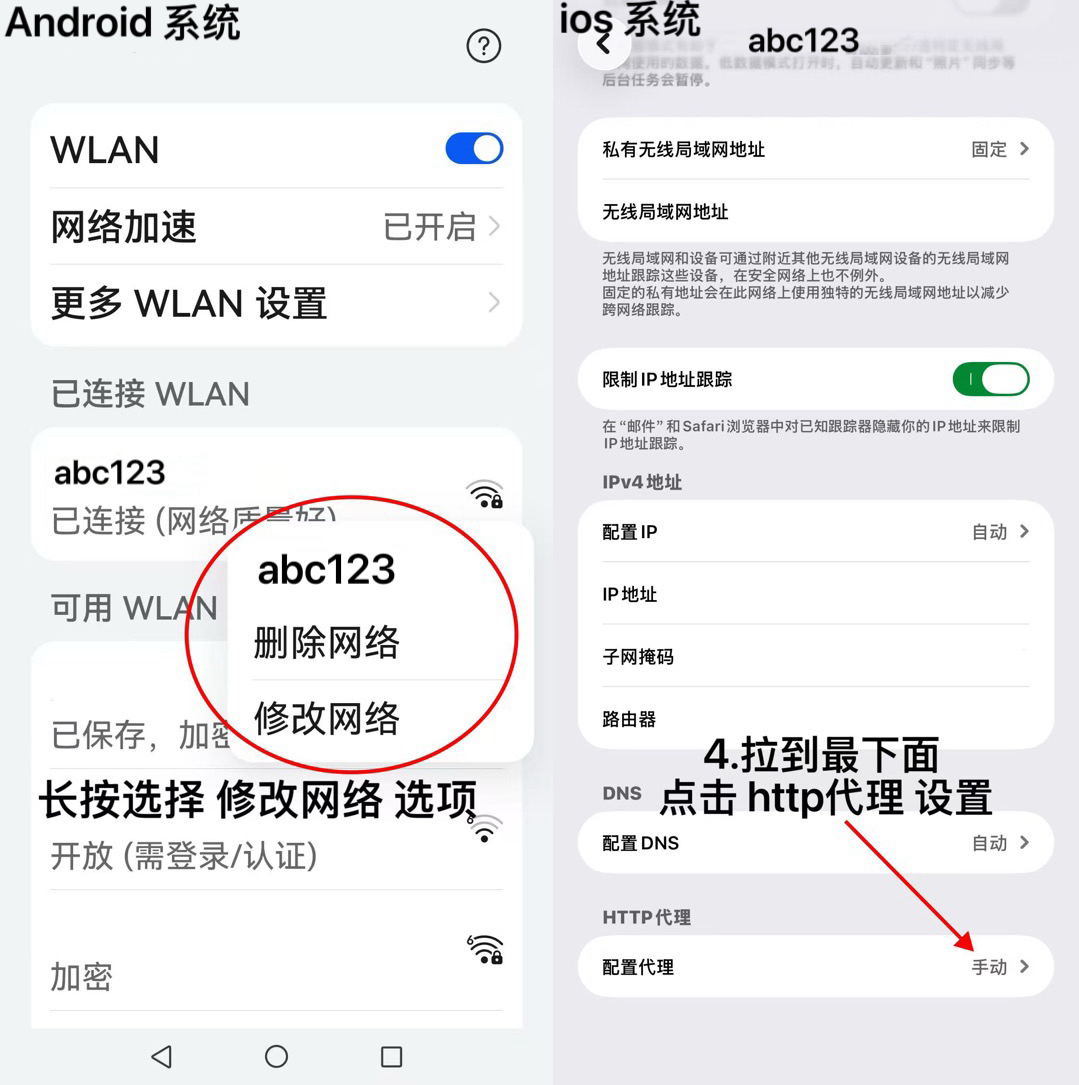
1. Open Wi-Fi Settings → Modify Network
Android
- Long-press your connected Wi-Fi network (e.g., abc123)
- Select Modify network
- Enable Advanced options
- Set Proxy → Manual
iOS
- Go to Settings → Wi-Fi
- Tap the ⓘ icon next to your current network
- Scroll to HTTP Proxy → Configure Proxy → Manual
2. Enter Proxy Server Details
Android
- In Proxy hostname, enter the IP from your scan (e.g.,
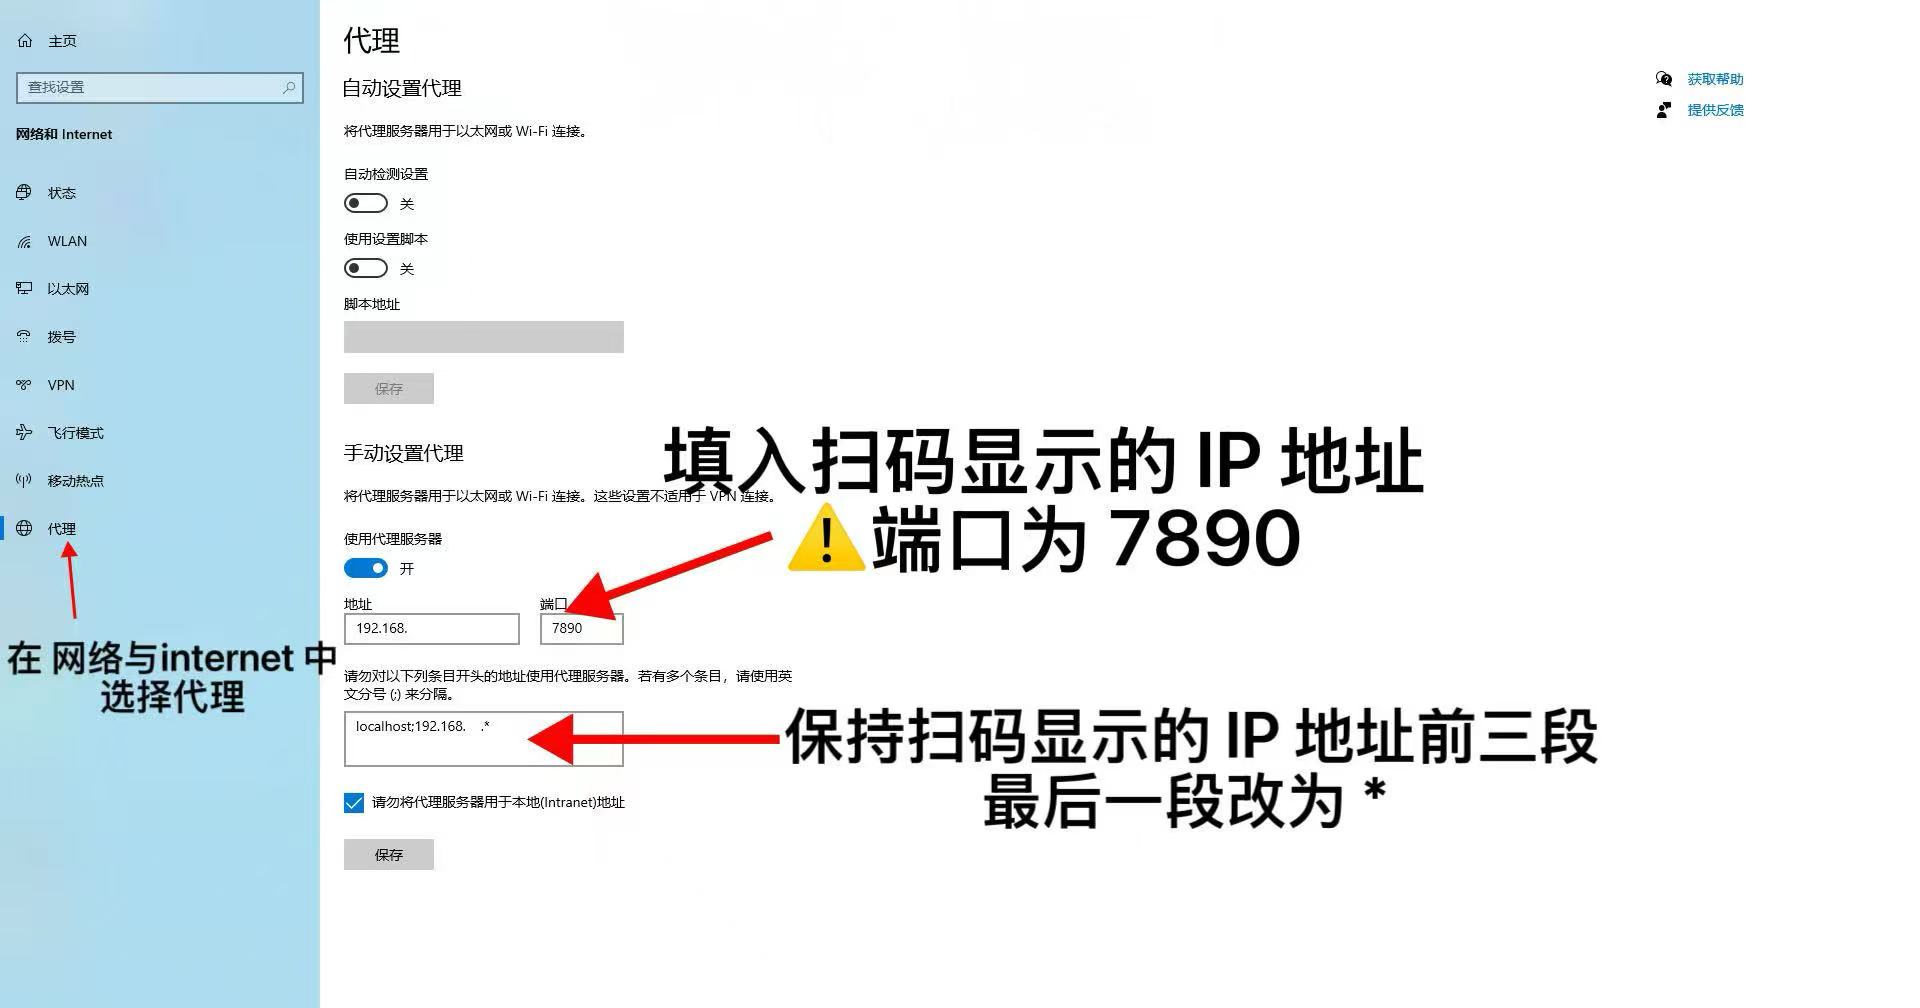
192.168.10.101) - In Bypass proxy for, enter the first three octets +
*:
Example:192.168.10.* - In Proxy port, enter: 7890
- Save—the device will reconnect automatically
iOS
- In Server, enter the scanned IP address
- In Port, enter: 7890
- Tap Store in the top-right corner

3. Windows 10/11 Manual Configuration Guide
Prerequisites
- You have the netAccel’s local IP from scanning
- Your PC is on the same home Wi-Fi network as the netAccel
1. Windows 10
- Open Settings → Network & Internet
- Click Proxy on the left
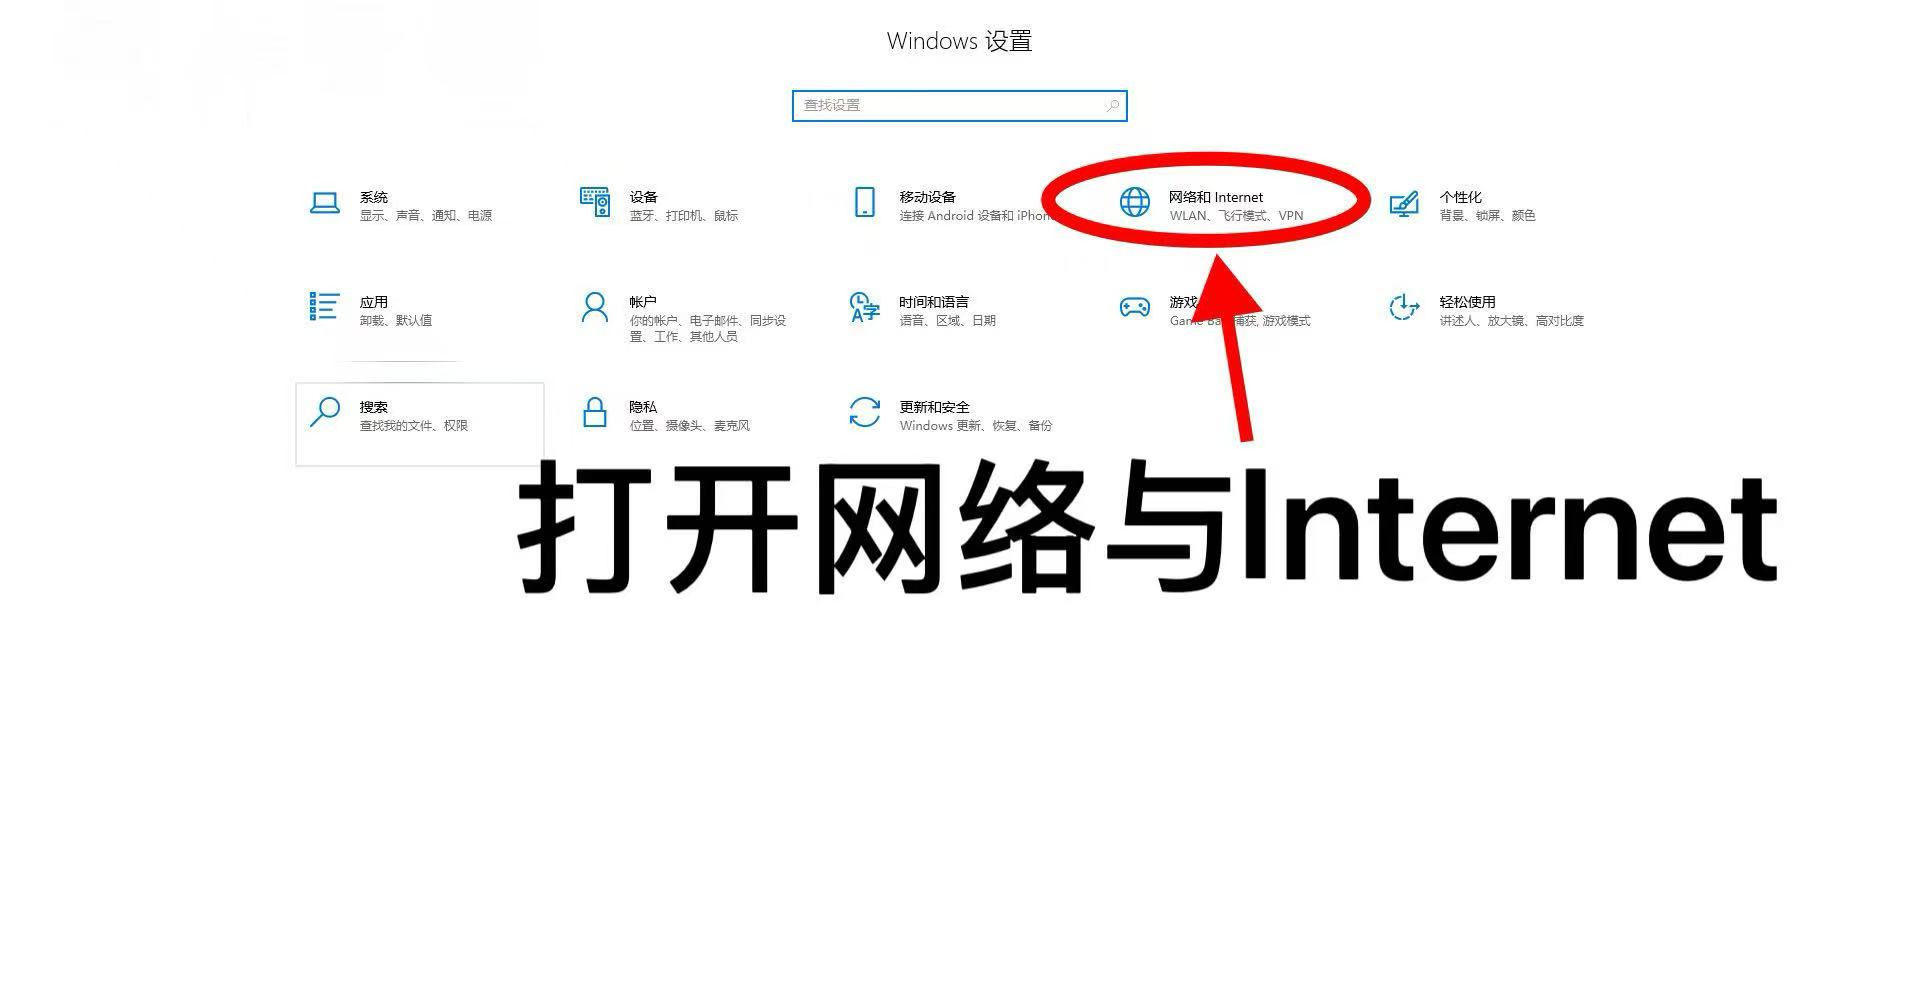
- Toggle Use a proxy server to On
- Enter the scanned IP as the Address
- Set Port to: 7890
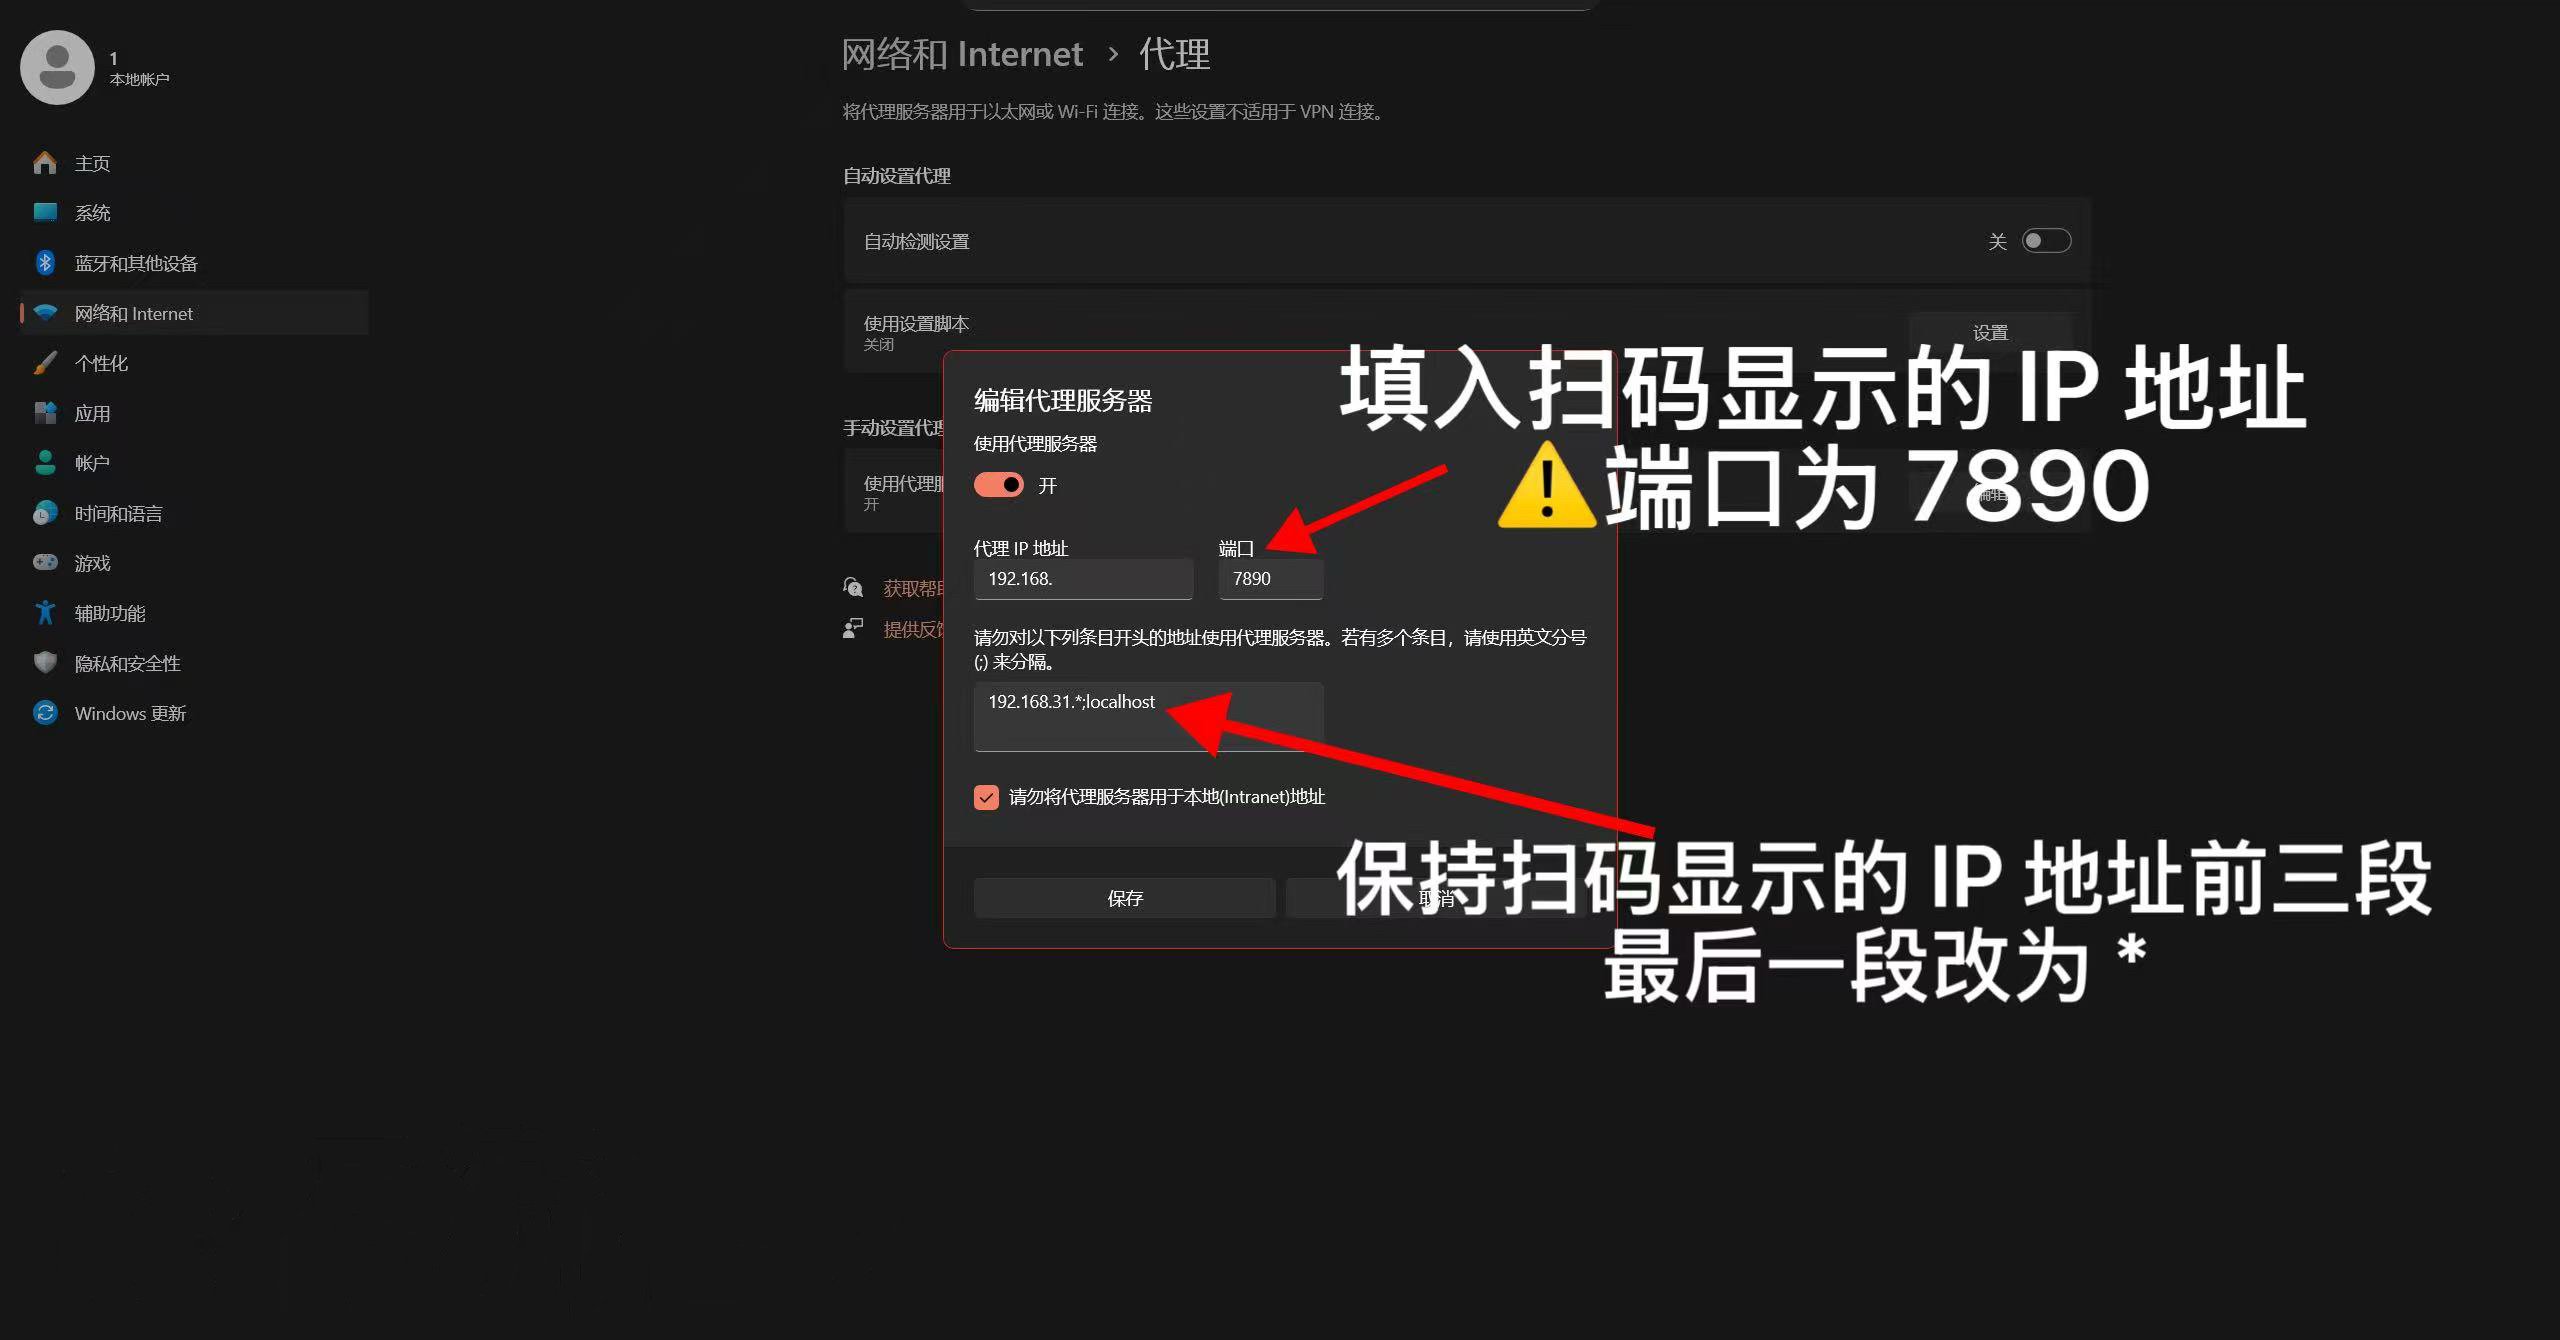
2. Windows 11
- Open Settings → Network & Internet
- Click Proxy
- Under Manual proxy setup, click Edit
- Toggle Use a proxy server to On
- Enter the scanned IP as the address, and 7890 as the port
🎉 Congratulations!
You’ve successfully completed setup for your netAccel Standard Edition.
From now on, just connect to your home Wi-Fi to enjoy a cleaner, faster internet experience.
Notes:
- 1. If you can access your router settings (as suggested in 1.1), set the primary DNS (DNS1) to the netAccel’s local IP.
- 2. If you cannot access router settings, on Windows: go to Settings → Network → Advanced network settings → More network adapter options, right-click your active connection → Properties → select Internet Protocol Version 4 (TCP/IPv4) → Properties → choose Use the following DNS server addresses, and enter the netAccel’s IP as the Preferred DNS server.
- 3. To disable netAccel features at any time, simply remove the proxy and/or DNS settings from your device. The netAccel does not affect other devices unless they are explicitly configured to use it.
- 4. If the netAccel’s local IP changes (and you’ve configured proxy/DNS), update your device settings with the new IP—otherwise, you may lose connectivity.
- 5. During the “Network Learning” step (1.2), prefer nodes with lower latency numbers.
- 6. Please photograph the QR code on your netAccel for safekeeping.